For the complete documentation index, see llms.txt. This page is also available as Markdown.

How to use the Account Library

Share one journey map, persona, or template across every workspace in your account and keep it in sync from a single source.

The Account Library makes an item available across all your workspaces as a single synced reference. Edit it once and the change appears everywhere it is used, which is the difference between the library and a plain copy.

Plan availability

The Account Library is available on the Framework and Governance plans only. To use it, upgrade your plan.

The Account Library appears once your account has a second workspace, so you need at least two to use it. See How to create a workspace if you only have one.

What the Account Library is

The Account Library is a shared content layer for your whole account. An item you add to it stays a single source: it shows up in every workspace, and editing it in one place updates it everywhere it is used. A copy, by contrast, is an independent duplicate that does not stay in sync.

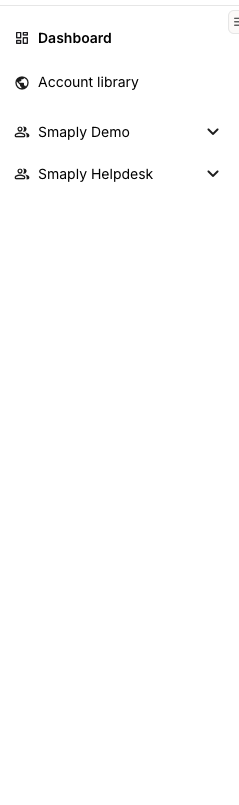
It lives in the left sidebar as the Account library item, directly above your list of workspaces.

The left sidebar showing Dashboard, then the Account library item marked with a globe icon, then two workspace entries listed below it.
The Account library item sits above your workspaces
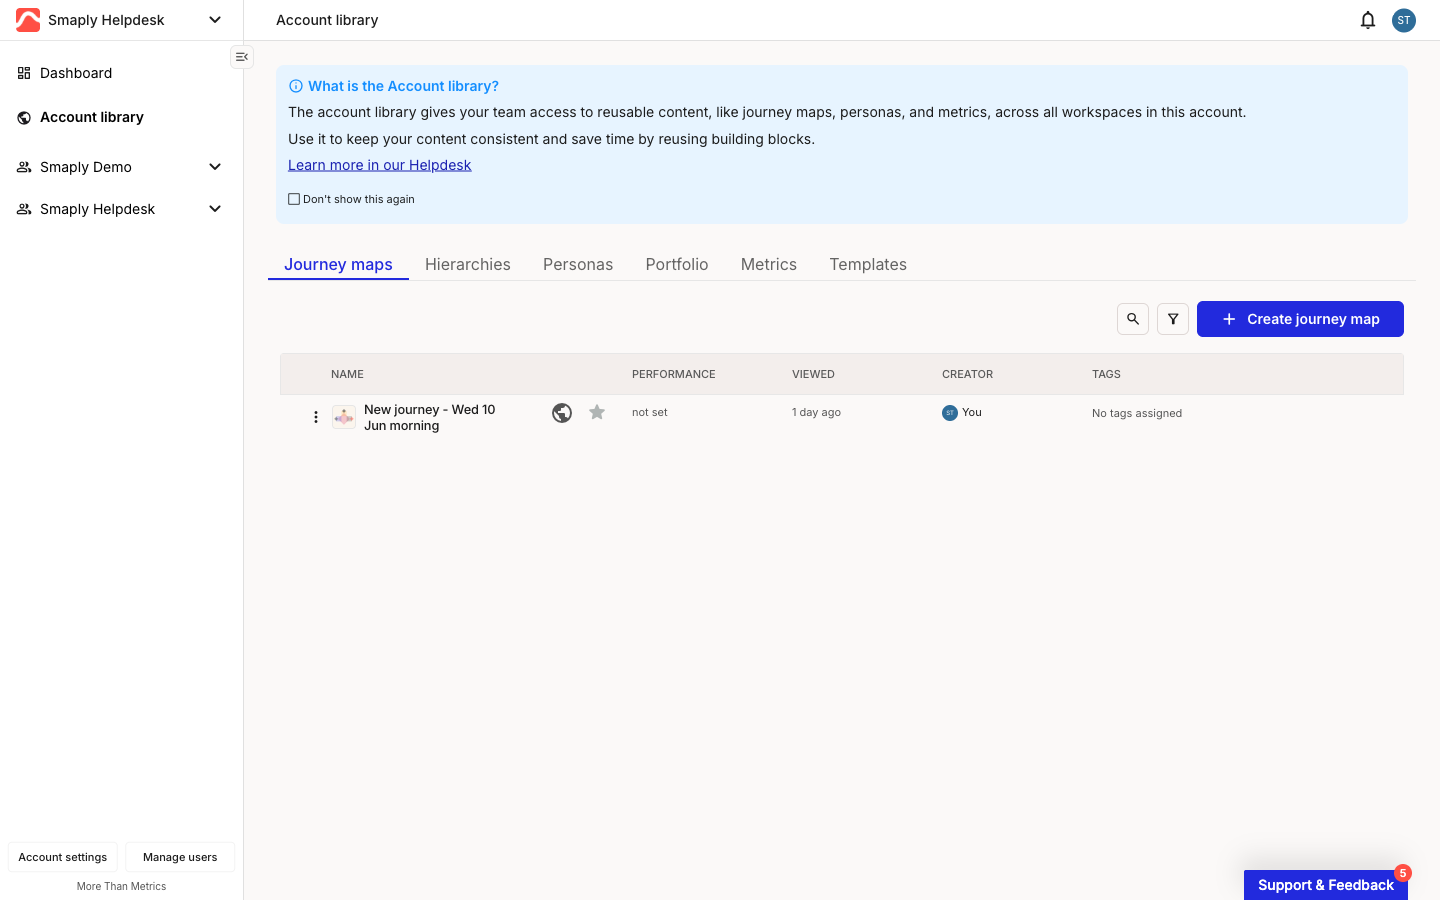
The page is split into six tabs for the content types the library holds: Journey maps, Hierarchies, Personas, Portfolio, Metrics, and Templates. Each tab lists the items of that type currently in the library.

The Account library page with content-type tabs for Journey maps, Hierarchies, Personas, Portfolio, Metrics, and Templates. The Journey maps tab is open, listing one map with a globe icon next to its name.
Account library, Journey maps tab

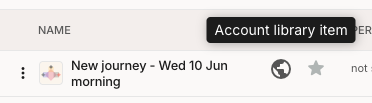
Wherever a library item appears, a globe icon sits next to its name. Hover it and the tooltip reads Account library item, so you can tell a synced item apart from a workspace-only one at a glance.

A journey map row with a globe icon next to its name and a tooltip reading Account library item.
The globe marks an item as shared across the account
How to add an item to the Account Library

Admins and editors of a workspace can add items to the library. Open the relevant list in a workspace, then add a single item from its row menu or several at once from the bulk action bar.

1

Open the list for the item type

In the workspace sidebar, open the list for what you want to share, such as Journey maps, Personas, or Templates.

2

Add the item from its three-dot menu

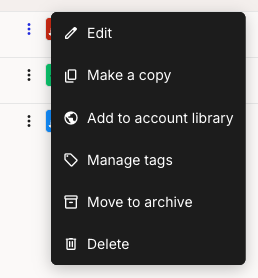
On the item's row, open the three-dot menu and choose Add to account library. On a journey map or template row the same action reads Move to library instead.

A persona row three-dot menu listing Edit, Make a copy, Add to account library, Manage tags, Move to archive, and Delete.
Persona row menu: Add to account library
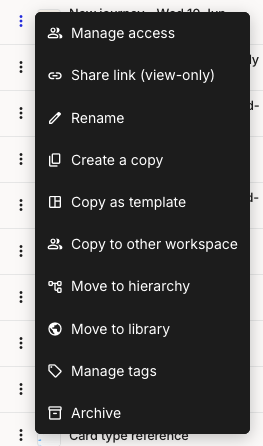
A journey map row three-dot menu listing Manage access, Share link, Rename, Create a copy, Copy as template, Copy to other workspace, Move to hierarchy, Move to library, Manage tags, and Archive.
Journey map row menu: the same action reads Move to library
3

Or add several at once

Select the rows you want with their checkboxes, then click Add to account library in the bulk action bar.

The item stays in its original workspace and also becomes available everywhere else in the account.

Adding a journey map brings its linked items along

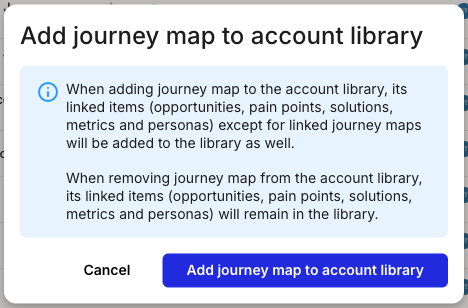
When you add a journey map, Smaply confirms that its linked items (opportunities, pain points, solutions, metrics, and personas) come into the library with it. Those linked items stay in the library even if you later move the map back out.

Add journey map to account library

When you add a portfolio item (such as a pain point) to the library by itself, its linked portfolio items (related opportunities, solutions) do not come along; they stay in the origin workspace. That is the opposite of adding a journey map, which brings its linked items with it.


How to edit a shared library item

Open a library item the way you open any other, from the Account Library page or from any workspace it appears in. A banner reading You are editing an Account Library item. sits at the top of the editor.

The top of a journey map editor showing an Account library breadcrumb and a dark banner reading You are editing an Account Library item.
The banner confirms your edits propagate account-wide
That banner is your signal that the change is not local: edits to a library item flow to every workspace and every map where the item is used.


How to remove an item from the Account Library

Only account admins can remove items, a tighter requirement than adding. Work from inside the Account Library page.

1

Open the remove action

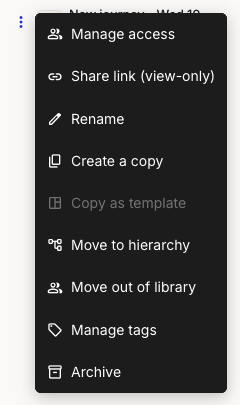
On the item's row, open the three-dot menu and choose Move out of library. To remove several at once, select them and click Remove from account library in the bulk action bar.

A library item three-dot menu listing Manage access, Share link, Rename, Create a copy, Copy as template (greyed out), Move to hierarchy, Move out of library, Manage tags, and Archive.
Inside the library, the remove action is Move out of library
2

Pick the workspace it returns to

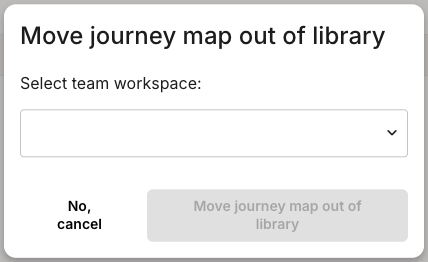
In the Move journey map out of library dialog, use the Select team workspace dropdown to choose which workspace the item moves back into, then confirm. If removing the item would affect other journey maps that use it, Smaply warns you first.

A dialog headed Move journey map out of library with a Select team workspace dropdown and a confirm button that stays disabled until a workspace is chosen.
Choose the destination workspace before confirming

Warning: a library item is a reference, not a copy

Last updated