For the complete documentation index, see llms.txt. This page is also available as Markdown.

How to change a user's role

Switch an existing user between Admin, Editor, and Viewer at the account or workspace level.

Change what someone can do in your account or workspace by opening their row in the user list and picking a new role from the dropdown. The roles are Admin, Editor, and Viewer, and the steps are the same wherever you manage users.

Prerequisites

How to change a user's role

1

Open the user list

For account-wide access, go to Account settings and click the Users tab. For a single workspace, go to Workspace settings and click the Manage users tab.

2

Open the role dropdown on their row

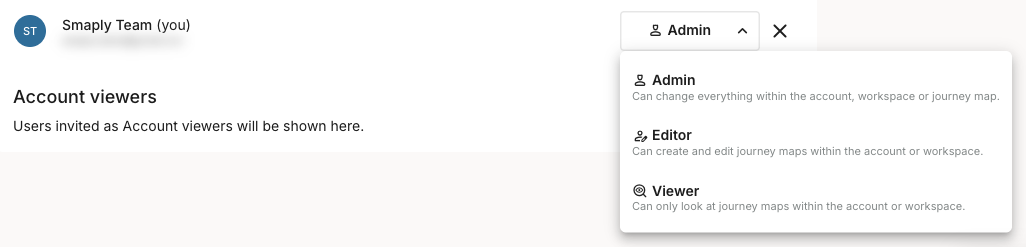
Find the person in the list and click the role dropdown on their row. It opens to show Admin, Editor, and Viewer, each with a one-line description, with their current role marked.

A user row with the role dropdown open, listing Admin, Editor, and Viewer. Each role has a one-line description of what it can do, and the current role is marked.
Role dropdown on a user's row, open
3

Select the new role

Click the role you want. The change saves automatically, so the new role applies to that person right away, with no separate confirm step.

To take someone's access away entirely instead of lowering it, see How to remove a user. Changing someone to Viewer keeps their access but limits them to viewing journey maps and commenting on cards. For what each role can do and how account access cascades to workspaces and maps, see Access levels and permissions.

Last updated