> For the complete documentation index, see [llms.txt](https://helpdesk.smaply.app/llms.txt). Markdown versions of documentation pages are available by appending `.md` to page URLs; this page is available as [Markdown](https://helpdesk.smaply.app/account-and-team/users-and-roles/how-to-invite-users.md).

# How to invite users

Bring people into Smaply by entering their email, picking a role, and clicking **Invite**. You invite from one of three places depending on how much you want them to see: the whole account, a single workspace, or one journey map.

{% hint style="warning" icon="list-check" %}

#### Prerequisites

You need Admin permissions at the level you're inviting at. Editors can't manage users.
{% endhint %}

#### Choose where to invite

The place you invite from sets how much the person can access. Wider access cascades down: an account invite reaches every workspace and map, a workspace invite reaches the maps in that workspace, and a map invite reaches one map.

* [**Account level**](#account) - The person works across your whole account. Best for core team members and admins.
* [**Workspace level**](#workspace) - The person sees one workspace and its journey maps, nothing else. Best for project teams and external collaborators.
* [**Journey map level**](#journey-map) - The person sees a single journey map. Best for stakeholders, clients, or workshop participants reviewing one journey.

To give someone view-only access without a Smaply account at all, share a public link instead of inviting them. See [How to share a journey map via HTML link](/sharing-and-exporting/how-to-share-a-journey-map-via-html-link.md).

{% tabs %}
{% tab title="Account" %}
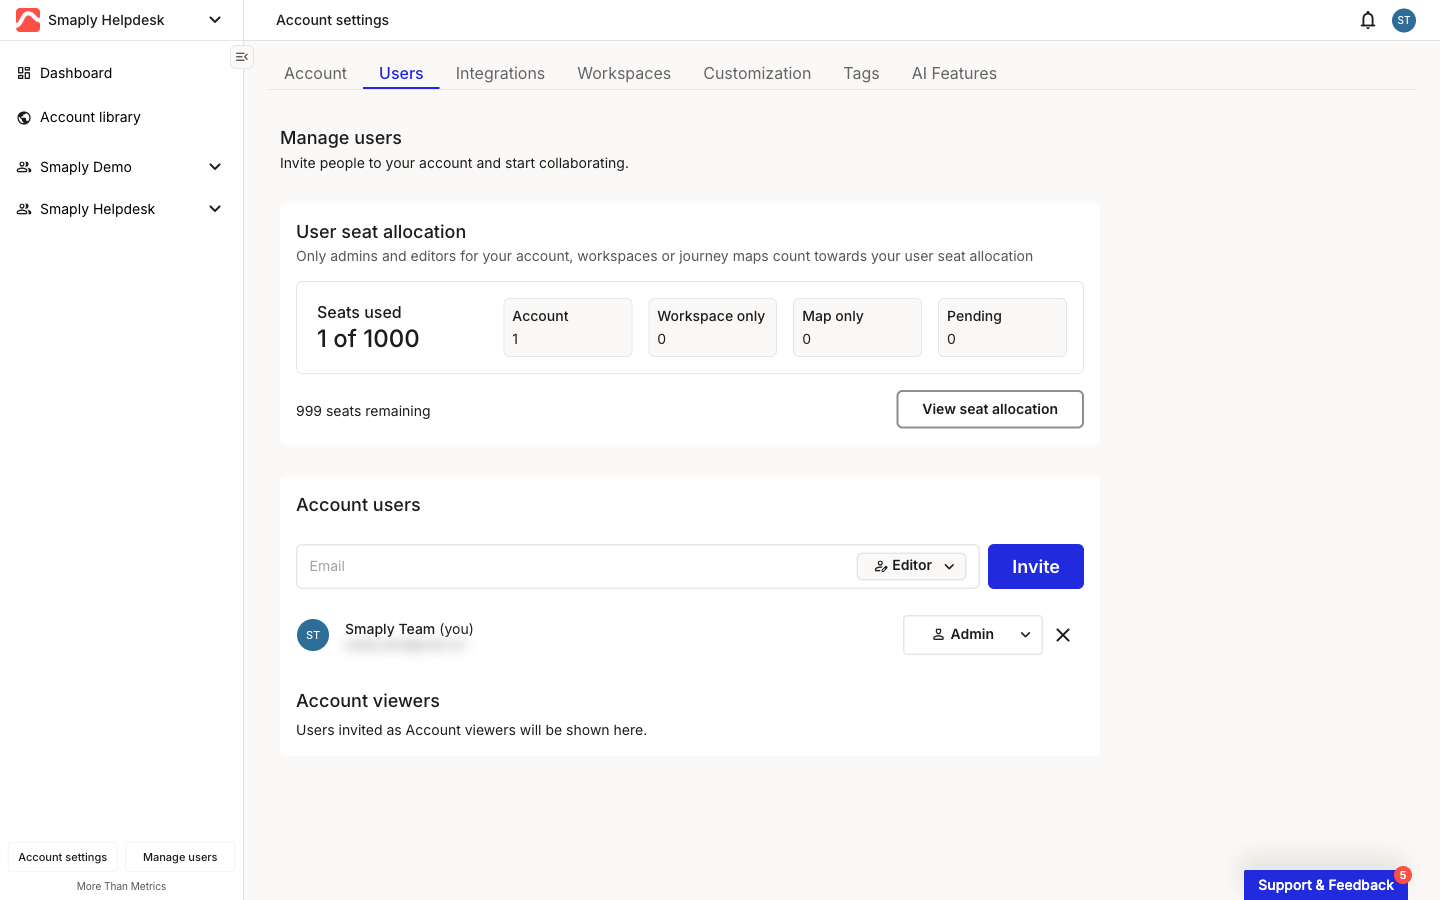
Account invites live in **Account settings**, which opens from the account name at the top of the left sidebar.

{% stepper %}
{% step %}
**Open the Users tab**

In **Account settings**, click the **Users** tab.

<figure><img src="/files/2K8HmRy8ZAE6WwqFXeFw" alt="Account settings with the Users tab selected. The page shows a User seat allocation summary, an Account users section with an email field, role dropdown, and Invite button, and an Account viewers section below."><figcaption><p>Account settings > Users</p></figcaption></figure>
{% endstep %}

{% step %}
**Enter the email and pick a role**

Under **Account users**, type the person's email, then set the role dropdown (it defaults to **Editor**).

<figure><img src="/files/H0qkjHvOeEDV3UYZFl7h" alt="The Account users invite row: an empty Email field, a role dropdown set to Editor, and a blue Invite button."><figcaption><p>Account users invite row</p></figcaption></figure>
{% endstep %}

{% step %}
**Click Invite**

The person is added to **Account users** with a pending status until they accept.
{% endstep %}
{% endstepper %}
{% endtab %}

{% tab title="Workspace" %}
Workspace invites live in **Workspace settings**, which opens from **Settings** in that workspace's sidebar section.

{% stepper %}
{% step %}
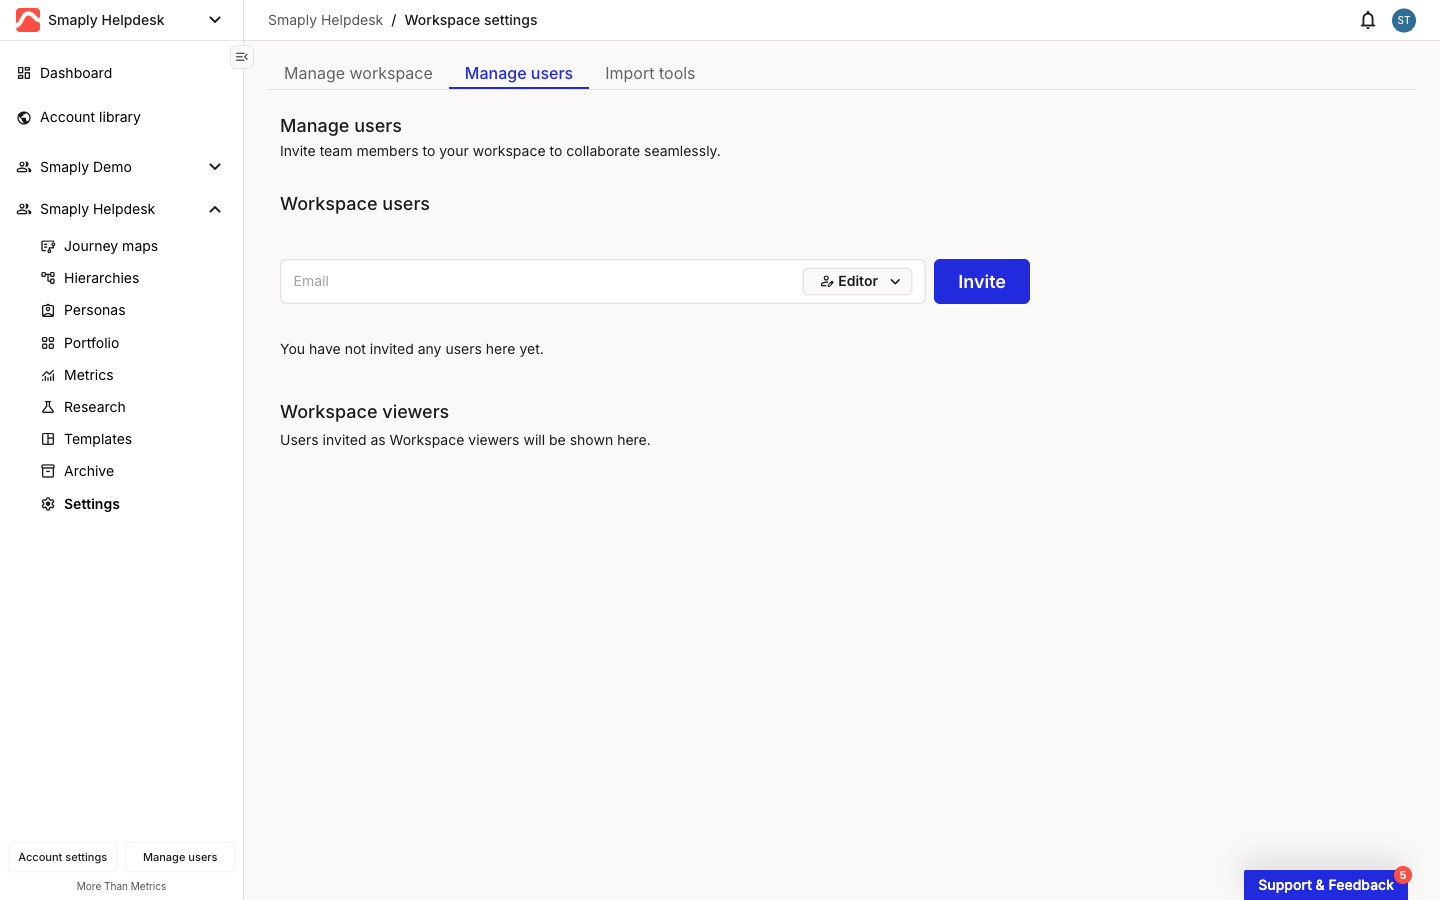
**Open the Manage users tab**

In **Workspace settings**, click the **Manage users** tab.

<figure><img src="/files/3og9cveTOAiWAsBMWrUp" alt="Workspace settings with the Manage users tab selected. A Workspace users section holds an email field, a role dropdown set to Editor, and an Invite button. A separate Workspace viewers section sits below."><figcaption><p>Workspace settings > Manage users</p></figcaption></figure>
{% endstep %}

{% step %}
**Enter the email and pick a role**

Under **Workspace users**, type the person's email and set the role. They get access to this workspace only.
{% endstep %}

{% step %}
**Click Invite**

The person is added under **Workspace users**. People who already have account-level access aren't listed here, since that access is inherited.
{% endstep %}
{% endstepper %}
{% endtab %}

{% tab title="Journey map" %}
Journey map invites live behind the **Share** button in the top-right corner of the journey map editor.

{% stepper %}
{% step %}
**Open Manage access**

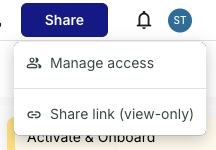
Click **Share**, then select **Manage access**.

<figure><img src="/files/8BPypXrr5beS0oF93X9v" alt="The Share dropdown in the journey map editor, showing two options: Manage access and Share link (view-only)."><figcaption><p>Share > Manage access</p></figcaption></figure>
{% endstep %}

{% step %}
**Enter the email and pick a role**

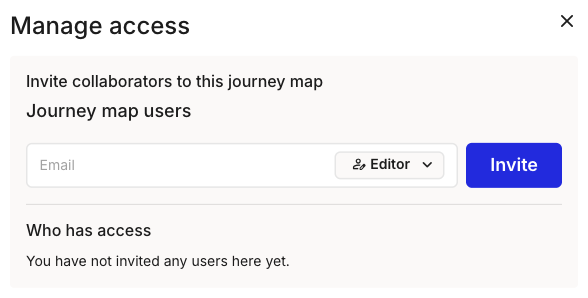
In the **Manage access** modal, type the person's email under **Journey map users** and set the role. They get access to this one map.

<figure><img src="/files/rhtKGCISmDGmFBgem1Se" alt="The Manage access modal, headed Invite collaborators to this journey map. A Journey map users row has an email field, a role dropdown set to Editor, and an Invite button. A Who has access list sits below."><figcaption><p>Manage access modal</p></figcaption></figure>
{% endstep %}

{% step %}
**Click Invite**

The person appears under **Who has access**. This list shows only people invited to this map; account- and workspace-level access is inherited and isn't relisted.
{% endstep %}
{% endstepper %}
{% endtab %}
{% endtabs %}

***

#### Which role to pick

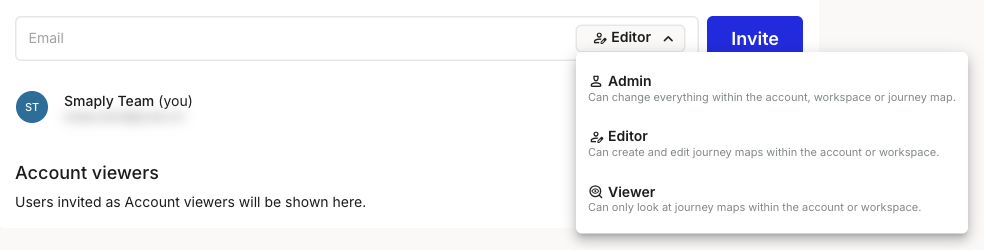
The role dropdown offers the same three roles everywhere you invite, and defaults to **Editor**:

* **Admin** - Can change everything within the account, workspace, or journey map, including managing users.
* **Editor** - Can create and edit journey maps and other content.
* **Viewer** - Can view journey maps and add comments, but can't edit.

<figure><img src="/files/iWS6myObxCa1hxaHqBFZ" alt="The role dropdown open on the invite row, listing Admin, Editor, and Viewer, each with a one-line description of what the role can do."><figcaption><p>Role dropdown, open</p></figcaption></figure>

For what each role can do at each level and how access cascades, see [Access levels and permissions](/account-and-team/users-and-roles/access-levels-and-permissions.md).

{% hint style="info" icon="tag" %}
Viewers don't count toward your admin and editor seats. They use separate viewer licenses, and viewer availability depends on your plan. See [How to check seat usage](/account-and-team/billing-and-plans/how-to-check-seat-usage.md).
{% endhint %}

***

#### What happens after you invite someone

The person gets an email and an in-app notification with your invitation. If they're new to Smaply, they sign up and join your account rather than creating a separate one. If they already use Smaply, they're added to their existing login.

A pending invitation never expires, so it stays valid until the person accepts or you revoke it. For the recipient's side of accepting, see [How to join by invitation](/account-and-team/users-and-roles/how-to-join-by-invitation.md).

A seat is counted once the person accepts, not while their invitation is pending. One person is one seat no matter how many levels they have access to, and if they hold more than one level, their highest level is what counts.

#### Related topics

<table data-column-title-hidden data-view="cards"><thead><tr><th>Article</th><th>What it covers</th><th data-hidden data-card-target data-type="content-ref">Target</th></tr></thead><tbody><tr><td><strong>Access levels and permissions</strong></td><td>What Admin, Editor, and Viewer can do, and how account access cascades to workspaces and maps.</td><td><a href="/pages/escpmNlj3DUgMgLSjGAl">/pages/escpmNlj3DUgMgLSjGAl</a></td></tr><tr><td><strong>How to change a user's role</strong></td><td>Switch someone between Admin, Editor, and Viewer after they're in.</td><td><a href="/pages/NwZSGMrWNr2EdTwknpdW">/pages/NwZSGMrWNr2EdTwknpdW</a></td></tr><tr><td><strong>How to remove a user</strong></td><td>Revoke access at the account or workspace level and what the person loses.</td><td><a href="/pages/kAHKecCimBhsc1BbbgkZ">/pages/kAHKecCimBhsc1BbbgkZ</a></td></tr><tr><td><strong>How to join by invitation</strong></td><td>The recipient side: accepting an invite and signing in.</td><td><a href="/pages/pX3Gp7orHSwLkvS0VPpW">/pages/pX3Gp7orHSwLkvS0VPpW</a></td></tr><tr><td><strong>How to check seat usage</strong></td><td>See how many seats you're using and how viewer licenses are tracked.</td><td><a href="/pages/DSbAXM2ZSmZbbAkkZWSz">/pages/DSbAXM2ZSmZbbAkkZWSz</a></td></tr></tbody></table>


---

# Agent Instructions
This documentation is published with GitBook. GitBook is the documentation platform designed so that both humans and AI agents can read, navigate, and reason over technical content effectively. Learn more at gitbook.com.

## Querying This Documentation
If you need additional information that is not directly available in this page, you can query the documentation dynamically by asking a question.

Perform an HTTP GET request on the current page URL with the `ask` query parameter, and the optional `goal` query parameter:

```
GET https://helpdesk.smaply.app/account-and-team/users-and-roles/how-to-invite-users.md?ask=<question>&goal=<endgoal>
```

`ask` is the immediate question: it should be specific, self-contained, and written in natural language.
`goal` is optional and describes the broader end goal you are ultimately trying to accomplish on behalf of the user. GitBook uses it to tailor the answer towards what is most useful for that goal.

The response will contain a direct answer to the question and relevant excerpts and sources from the documentation.

Use this mechanism when the answer is not explicitly present in the current page, you need clarification or additional context, or you want to retrieve related documentation sections.