> For the complete documentation index, see [llms.txt](https://helpdesk.smaply.app/llms.txt). Markdown versions of documentation pages are available by appending `.md` to page URLs; this page is available as [Markdown](https://helpdesk.smaply.app/first-steps-for-admins.md).

# First steps for admins

Branding, team access, integrations, customization, and AI controls are all set in one place. Walk through them once and your team can start mapping in a workspace that already looks and works the way you want.

{% hint style="info" icon="compass" %}
If you're a Workspace Admin and only need to manage one workspace's settings, open **Settings** in the workspace sidebar instead.
{% endhint %}

{% hint style="warning" icon="list-check" %}

#### Prerequisites

You're an Account Admin and signed in to Smaply. If you've been invited to a Smaply Account but you're not sure which role you have, see [Access levels and permissions](/account-and-team/users-and-roles/access-levels-and-permissions.md).
{% endhint %}

{% hint style="info" icon="clipboard-list" %}

#### In this guide

1. [Where Account Settings lives and who can open it](#where-account-settings-lives-and-who-can-open-it)
2. [Set up your Account name, logo, icon, and brand colors](#set-up-your-account-name-logo-icon-and-brand-colors)
3. [Invite your team at the level that matches their access](#invite-your-team-at-the-level-that-matches-their-access)
4. [Connect Smaply to your metrics and planning tools](#connect-smaply-to-your-metrics-and-planning-tools)
5. [Set up tags and templates for the team](#set-up-tags-and-templates-for-the-team)
6. [Decide which AI features your team can use](#decide-which-ai-features-your-team-can-use)
7. [Keep an eye on seat usage and your plan](#keep-an-eye-on-seat-usage-and-your-plan)
   {% endhint %}

***

#### Where Account Settings lives and who can open it

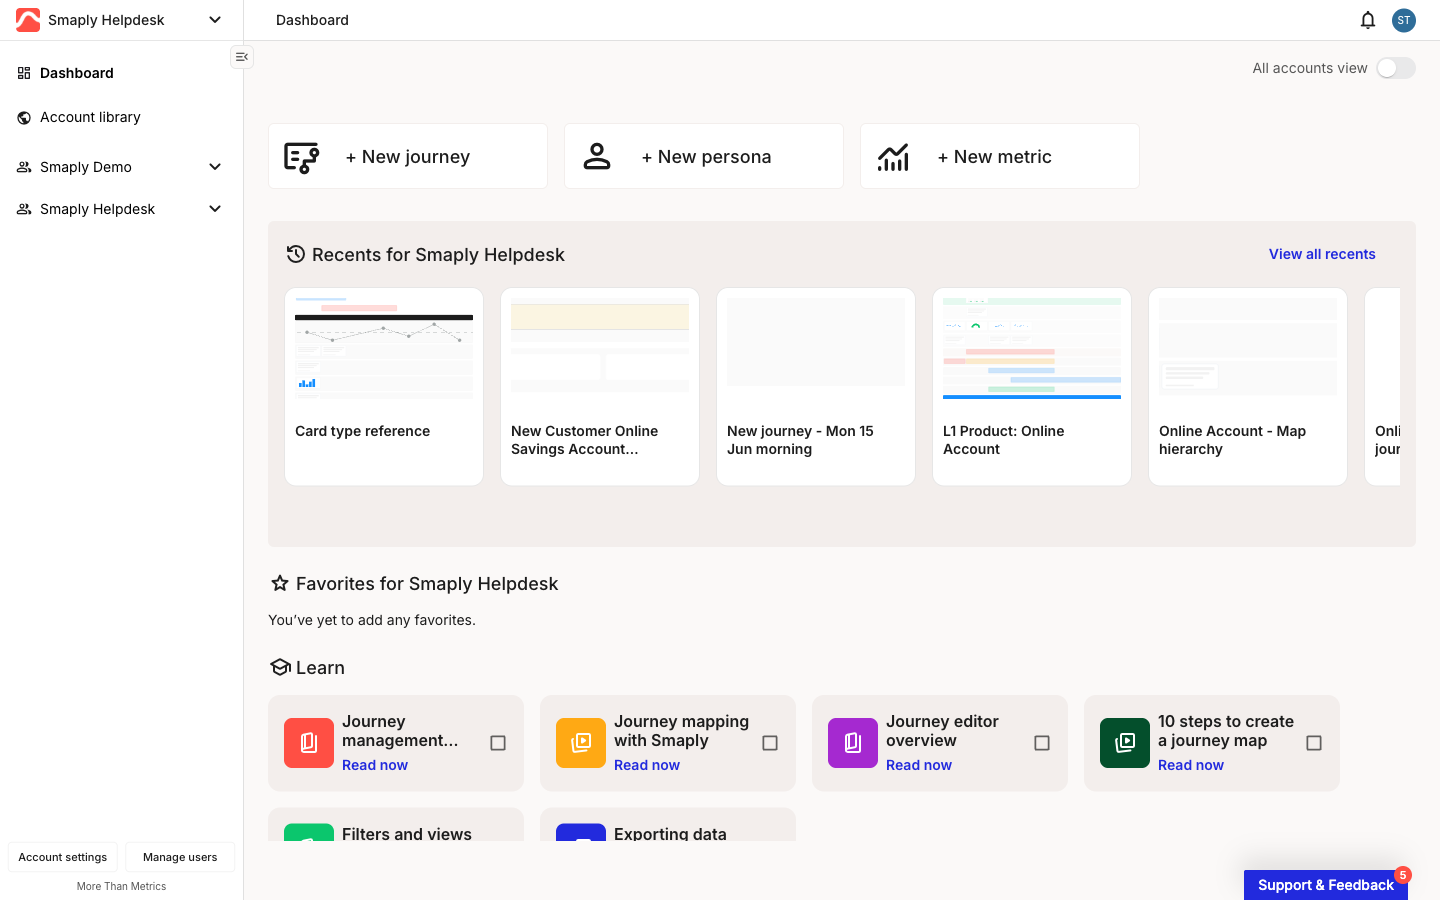
**Account Settings** is the admin-only configuration area for the whole Smaply Account. While you're at the account level, before entering a workspace, open it from the **Account settings** button at the bottom of the left sidebar, next to **Manage users**.

<figure><img src="/files/RHIFlx1HjK2jFQpYmapp" alt="Smaply dashboard at the account level. The left sidebar shows the account switcher dropdown at the top and, at the bottom, an Account settings button next to a Manage users button."><figcaption><p>Account settings opens from the bottom of the left sidebar</p></figcaption></figure>

The account-name dropdown at the top of the left sidebar is the account switcher. Use it to move between accounts you belong to or add another account. It doesn't hold settings.

Inside Account Settings, seven tabs cover everything an admin sets up:

* **Account** - Branding and subscription
* **Users** - Invitations and seat allocation
* **Integrations** - Metrics and planning tool connections
* **Workspaces** - Workspace list and per-workspace user management
* **Customization** - Custom Cards and Icon templates
* **Tags** - Tag categories and tags
* **AI Features** - Account-wide AI controls

Account Admins have access to everything here. Workspace Admins are limited to a single workspace's **Workspace Settings** and don't see Account Settings at all. See [Access levels and permissions](/account-and-team/users-and-roles/access-levels-and-permissions.md) for the full role and access model.

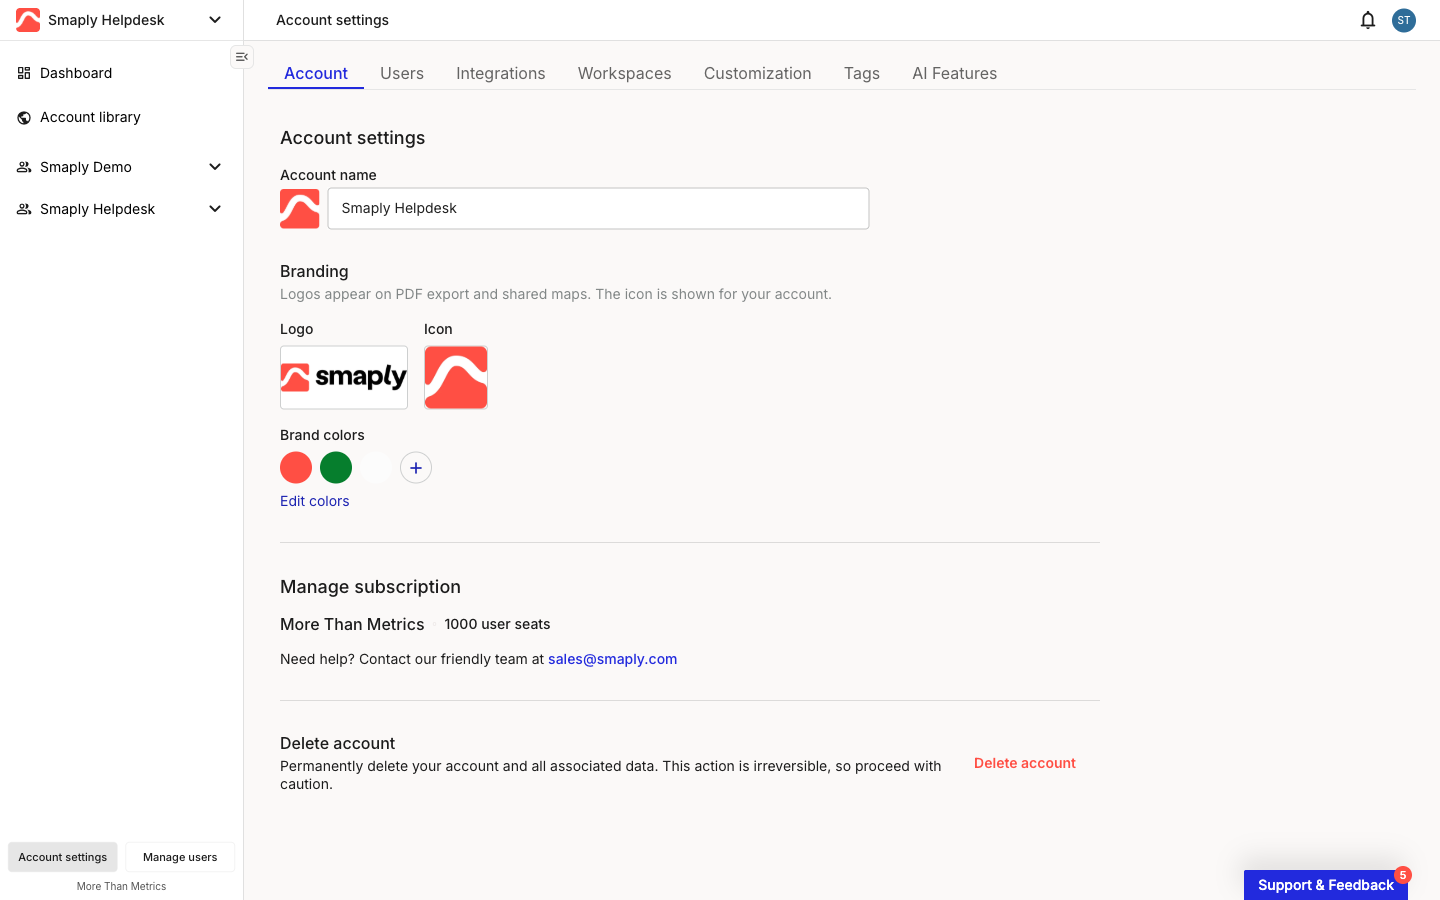
<figure><img src="/files/GeOzgUu5rvSsc9WGjPKE" alt="Account Settings open on the Account tab, with the seven-tab strip across the top: Account, Users, Integrations, Workspaces, Customization, Tags, and AI Features."><figcaption><p>Account Settings with the seven tabs across the top</p></figcaption></figure>

***

#### Set up your Account name, logo, icon, and brand colors

Branding is on the **Account** tab. It shows up on anything your team exports or shares, so set it before you invite people in.

* **Account name** - Editable text field, shown alongside the account avatar throughout Smaply.
* **Logo** - Wider format. Appears on PDF exports and shared journey maps.
* **Icon** - Square format. Used as the account avatar in navigation.
* **Brand colors** - Up to 14 custom colors that flow into color palettes across the platform.

For the full setup walkthrough, see [How to set up custom branding](/account-and-team/customization/how-to-set-up-custom-branding.md).

***

#### Invite your team at the level that matches their access

Smaply has three access levels. Pick the level that matches how broadly the person needs to work. Access at a broader level cascades down, so an account-level invitee has access to every workspace and journey map automatically.

* **Account level** - Use when someone needs access to everything in the Account. Invite from **Account Settings > Users**.
* **Workspace level** - Use when someone only works inside one workspace. Invite from that workspace's **Settings > Manage users**.
* **Journey-map level** - Use when someone only needs access to one specific map. Invite from the map's **Share** menu in the top-right of the editor.

Each invitation also assigns a role. A few things to know about roles and seats:

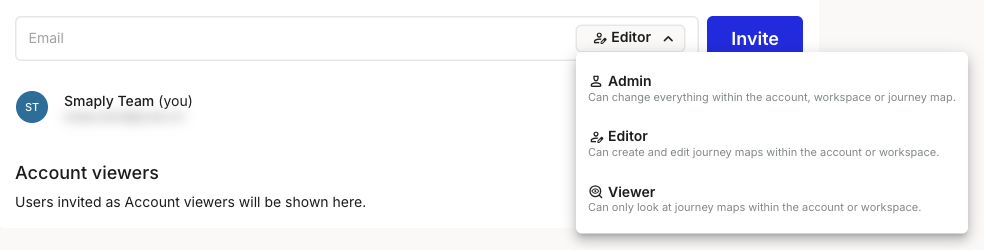
* Roles are **Admin**, **Editor**, or **Viewer**.
* Seats follow the user, not the access level. One person counts as one seat regardless of how many levels they have access to.
* Viewer seats are tracked separately from Admin and Editor seats.

For the full invite mechanics at any level, see [How to invite users](/account-and-team/users-and-roles/how-to-invite-users.md). For the role and level model in depth, see [Access levels and permissions](/account-and-team/users-and-roles/access-levels-and-permissions.md). To see what's available against your plan, see [How to check seat usage](/account-and-team/billing-and-plans/how-to-check-seat-usage.md).

{% hint style="info" icon="tag" %}

#### Plan availability

Viewer seats follow your plan. **Free** and **Repository** include no viewer seats. **Framework** includes 5. **Governance** is unlimited.
{% endhint %}

<figure><img src="/files/iWS6myObxCa1hxaHqBFZ" alt="Account Settings on the Users tab with the invite panel open, showing an email field and the role dropdown listing Admin, Editor, and Viewer."><figcaption><p>Account Settings > Users, inviting at the account level</p></figcaption></figure>

***

#### Connect Smaply to your metrics and planning tools

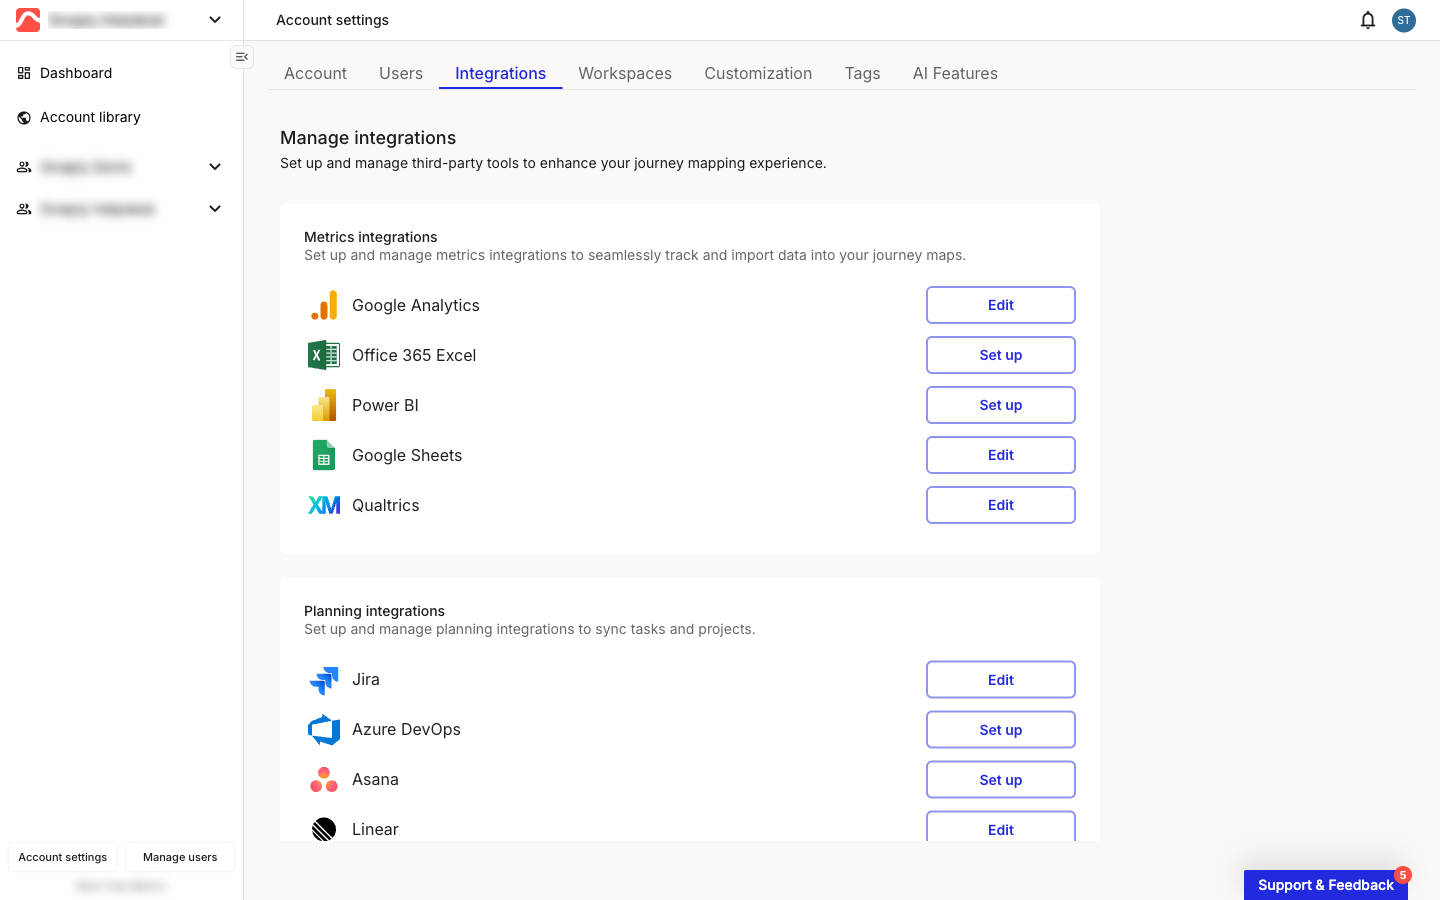
Integrations are configured once at the account level. Open the **Integrations** tab to see the two categories:

* **Metrics integrations** - **Google Analytics**, **Excel 365**, **Power BI**, **Google Sheets**, **Qualtrics**. These pull quantitative data into metric cards on journey maps.
* **Planning integrations** - **Jira**, **Azure DevOps**, **Asana**, **Linear**, **Trello**, **Monday.com**. These link work items to the journey steps they affect.

Connecting an integration is the admin's job. After it's connected, anyone on the workspace can drop the data onto a journey map.

For the connection flow on any integration, see [Set up your first integration](/integrations/set-up-your-first-integration.md). For cross-tool questions like refresh frequency, switching auth, and what happens on disconnect, see [How to manage integrations](/integrations/how-to-manage-integrations-at-account-level.md). For per-tool setup, see the article for your tool under **Metrics tools** or **Planning tools**.

{% hint style="info" icon="tag" %}

#### Plan availability

**Service account** authentication for **Google Analytics**, **Power BI**, and **Google Sheets** is available on **Governance**. On other plans, those three tools connect with **Login with your account (OAuth)**, which ties the connection to a single user.
{% endhint %}

<figure><img src="/files/uYzC34ml6kLtrkZ64FPA" alt="Account Settings on the Integrations tab, showing the metrics and planning tools each with a Set up or connected state."><figcaption><p>Account Settings > Integrations</p></figcaption></figure>

***

#### Set up tags and templates for the team

Two customization items are worth setting up early because they shape how the team organizes content and starts new work.

* **Tags** - Account-level metadata, shared across every workspace. Set up tag categories (each with an icon, color, and name) and the tags inside them. Configured on the **Tags** tab. See [How to create and edit tags](/account-and-team/tags/how-to-create-and-edit-tags.md).
* **Templates** - Pre-built journey map structures the team can reuse when creating new maps. Smaply provides starter templates. Your team can also save any journey map as a template. See [How to create and use templates](/account-and-team/customization/how-to-create-and-use-templates.md).

***

#### Decide which AI features your team can use

The **AI Features** tab sets the AI posture for the whole Account. Each AI feature has its own toggle, and a **Disable all** link turns every one off at once.

When an AI feature is disabled at the account level, it's hidden from the UI for everyone in the Account rather than greyed out. Content already generated by an AI feature stays in place either way.

For the current list of AI features and what each one does, see [How to configure AI features](/account-and-team/how-to-configure-ai-features.md).

{% hint style="info" icon="tag" %}

#### Plan availability

The AI features available depend on your plan. **Journey map create** works on every plan, with the **Free** plan capped at 3 generated maps per month and paid plans raising the cap. See [How to configure AI features](/account-and-team/how-to-configure-ai-features.md) for per-feature availability.
{% endhint %}

***

#### Keep an eye on seat usage and your plan

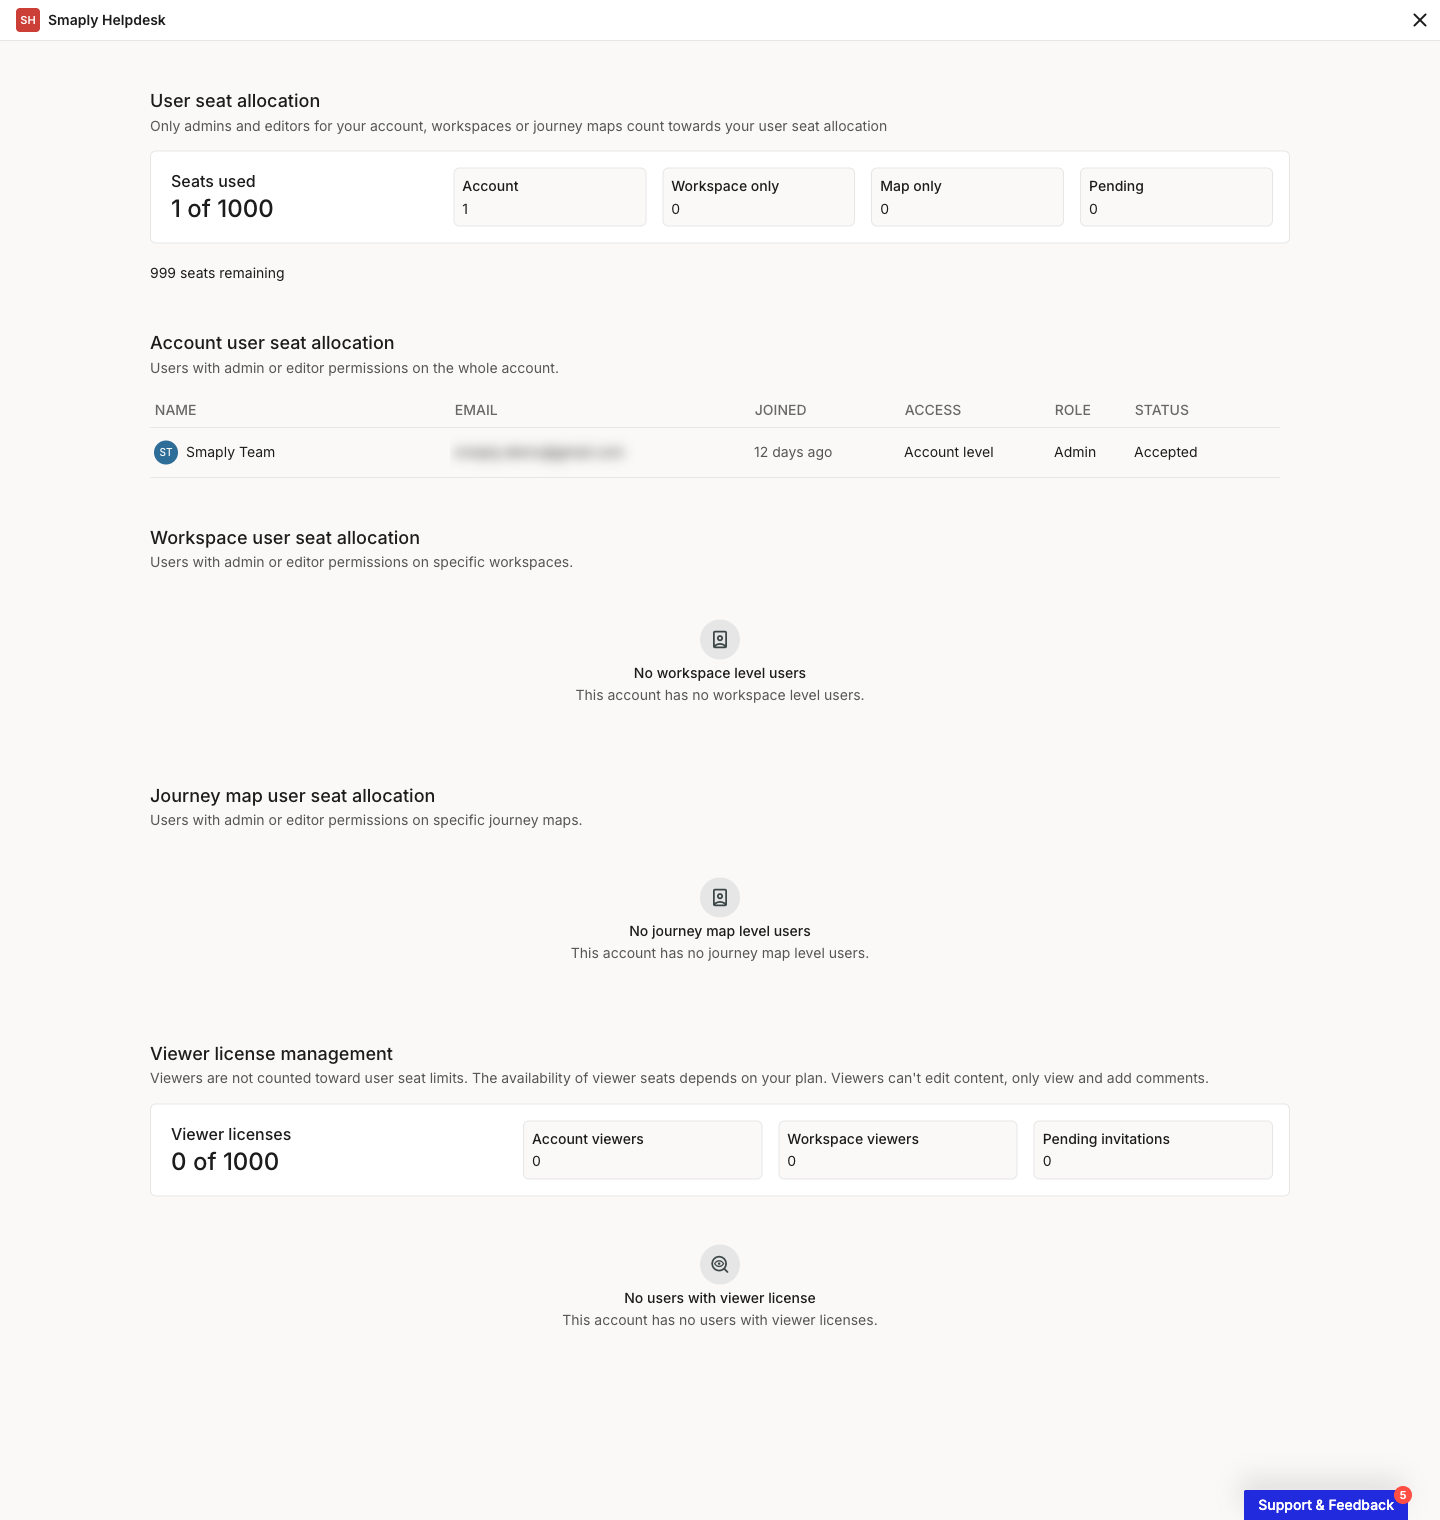
Seat usage lives on the **Users** tab. A **Seats used** summary at the top shows totals (e.g., "9 of 1000") with a breakdown by **Account**, **Workspace only**, **Map only**, and **Pending**. A **View seat allocation** button opens a detailed view that lists users per level, plus a separate **Viewer license management** section where viewer seats are tracked apart from Admin and Editor seats.

When the team is approaching the plan's seat allowance or wants a feature that's gated, the per-plan feature matrix shows what each tier unlocks.

For the seat views in depth, see [How to check seat usage](/account-and-team/billing-and-plans/how-to-check-seat-usage.md). For the plan feature comparison, see [What's included in each plan](/account-and-team/billing-and-plans/what-is-included-in-each-plan.md).

<figure><img src="/files/jYfsbaXZJzx1nxltmkiN" alt="The View seat allocation view, with a Seats used summary, per-level user lists, and a Viewer license management section showing viewer licenses used."><figcaption><p>View seat allocation, with the Viewer license management section</p></figcaption></figure>

***

#### What's next

<table data-column-title-hidden data-view="cards"><thead><tr><th>Title</th><th>Description</th><th data-hidden data-card-target data-type="content-ref">Target</th></tr></thead><tbody><tr><td><strong>How to invite users</strong></td><td>Invite mechanics across account, workspace, and journey-map level.</td><td><a href="/pages/F1Nzd1jlynqOnRaG0WSM">/pages/F1Nzd1jlynqOnRaG0WSM</a></td></tr><tr><td><strong>Set up your first integration</strong></td><td>The connection flow for metrics and planning tools.</td><td><a href="/pages/MnIIaFvymKzpE7B98hdU">/pages/MnIIaFvymKzpE7B98hdU</a></td></tr><tr><td><strong>Access levels and permissions</strong></td><td>How roles and access levels shape what each user can see and do.</td><td><a href="/pages/escpmNlj3DUgMgLSjGAl">/pages/escpmNlj3DUgMgLSjGAl</a></td></tr><tr><td><strong>Getting started with Smaply</strong></td><td>User-side onboarding. Forward this to invited team members.</td><td><a href="/pages/cKtZtZyWlxjJq2XWFvNp">/pages/cKtZtZyWlxjJq2XWFvNp</a></td></tr></tbody></table>


---

# Agent Instructions
This documentation is published with GitBook. GitBook is the documentation platform designed so that both humans and AI agents can read, navigate, and reason over technical content effectively. Learn more at gitbook.com.

## Querying This Documentation
If you need additional information that is not directly available in this page, you can query the documentation dynamically by asking a question.

Perform an HTTP GET request on the current page URL with the `ask` query parameter, and the optional `goal` query parameter:

```
GET https://helpdesk.smaply.app/first-steps-for-admins.md?ask=<question>&goal=<endgoal>
```

`ask` is the immediate question: it should be specific, self-contained, and written in natural language.
`goal` is optional and describes the broader end goal you are ultimately trying to accomplish on behalf of the user. GitBook uses it to tailor the answer towards what is most useful for that goal.

The response will contain a direct answer to the question and relevant excerpts and sources from the documentation.

Use this mechanism when the answer is not explicitly present in the current page, you need clarification or additional context, or you want to retrieve related documentation sections.