> For the complete documentation index, see [llms.txt](https://helpdesk.smaply.app/llms.txt). Markdown versions of documentation pages are available by appending `.md` to page URLs; this page is available as [Markdown](https://helpdesk.smaply.app/journey-maps/filtering-and-views/how-to-filter-and-save-list-views.md).

# How to filter and save list views

Narrow the journey maps list to just the items you need, then save that filter as a named view you can reopen in one click. The same filter-and-save mechanism works on your Portfolio, Metric, and Persona lists too.

{% hint style="info" icon="compass" %}
Filtering *inside* a journey map (lanes, personas, portfolio items) works differently. For that, see [How to filter a journey map](/journey-maps/filtering-and-views/how-to-filter-a-journey-map.md) and [How to save and apply a view](/journey-maps/filtering-and-views/how-to-save-and-apply-a-view.md).
{% endhint %}

{% hint style="info" icon="clipboard-list" %}

#### In this guide

1. [How to filter a workspace list](#how-to-filter-a-workspace-list)
2. [How filtering combines criteria](#how-filtering-combines-criteria)
3. [How to save a filter as a view](#how-to-save-a-filter-as-a-view)
4. [How to edit and update a saved view](#how-to-edit-and-update-a-saved-view)
   {% endhint %}

#### How to filter a workspace list

Open any workspace list (for example **Journey maps** in the sidebar) and click the filter icon in the toolbar, next to the search icon. A dropdown lists the criteria you can filter by.

<figure><img src="/files/nafIzYXMZZKry9JYwIQi" alt="The journey maps list with the toolbar filter dropdown open. The dropdown lists criteria with submenu arrows: Journey map, Creator, Viewed, Created, Performance, Coordinator, Tags, and Content source, with Clear all at the bottom."><figcaption><p>The toolbar filter and its criteria</p></figcaption></figure>

On the journey maps list the criteria are **Journey map**, **Creator**, **Viewed**, **Created**, **Performance**, **Coordinator**, **Tags**, and **Content source**. Click a criterion to open its submenu and pick the values to match. **Clear all** at the bottom removes every filter at once.

The criteria differ slightly per list (the Portfolio, Metric, and Persona lists offer the criteria that fit their content), but the mechanism is the same everywhere.

***

#### How filtering combines criteria

Two rules decide what a filtered list shows:

* Different criteria combine with AND. A **Creator** filter on top of a **Tags** filter narrows the result to items that match both.
* Within one criterion, you choose how its values combine. Each submenu has an operator dropdown with three options.

<figure><img src="/files/wCCm0NhvijCo8P1GHGNJ" alt="A filter criterion submenu with several values selected and the operator dropdown expanded, showing three options: Match any (OR) with the helper text Results match any filters, Match all (AND) with Results match all filters, and Match none (NOT) with Exclude items that match the filter."><figcaption><p>The within-criterion operator: Match any, Match all, Match none</p></figcaption></figure>

* **Match any (OR)** keeps items that match at least one selected value.
* **Match all (AND)** keeps only items that match every selected value.
* **Match none (NOT)** excludes items that match the selected values.

For example, filtering **Tags** by two tags with **Match any (OR)** shows items carrying either tag; **Match all (AND)** shows only items carrying both.

***

#### How to save a filter as a view

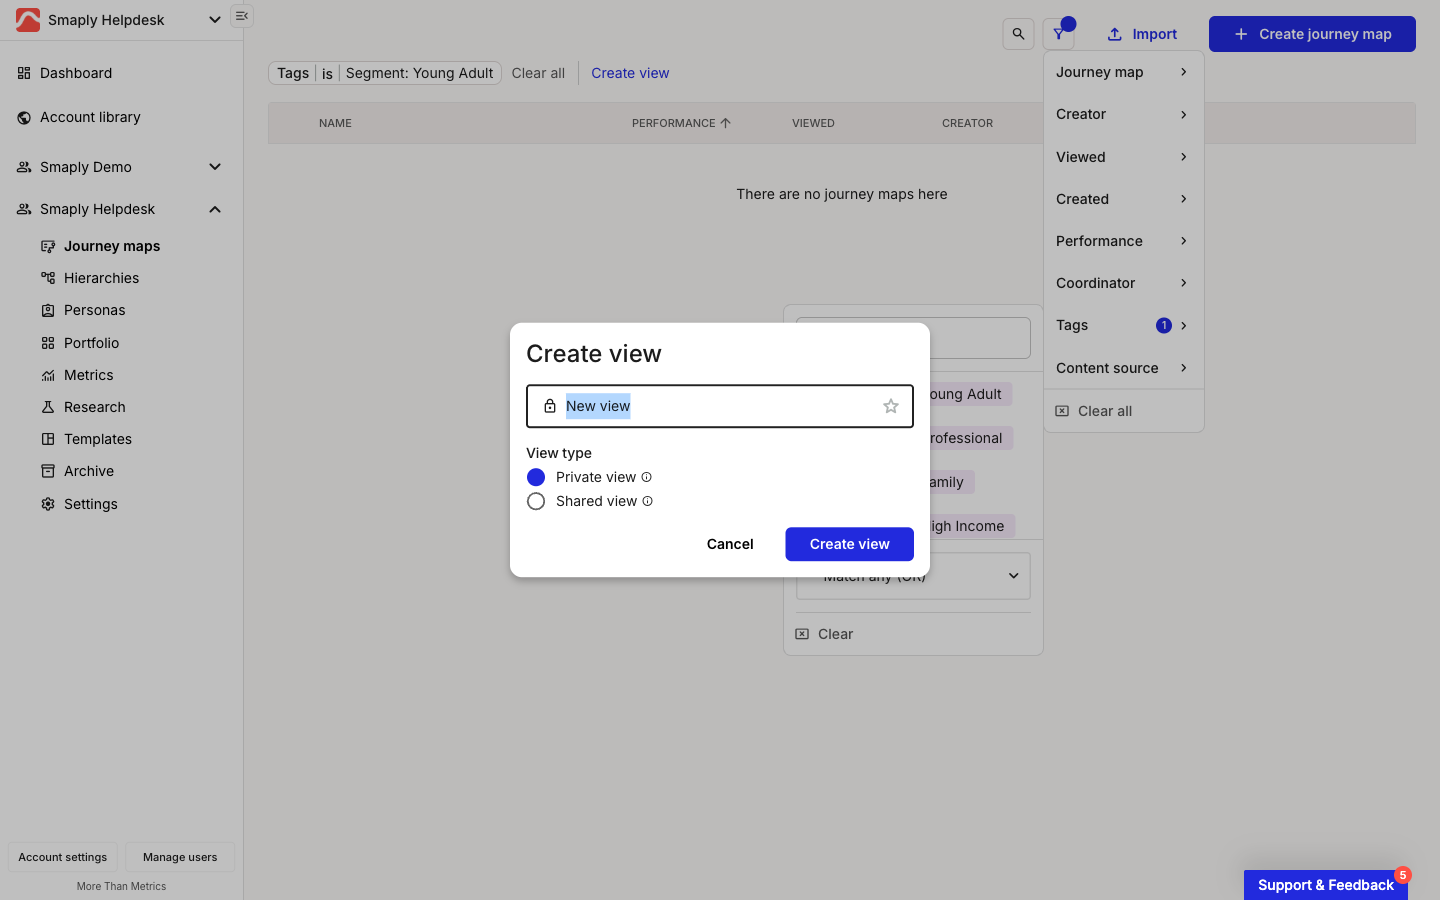
Once a filter is applied, an active-filter bar appears above the list with a pill for each filter, a **Clear all** option, and a **Create view** link. Saving turns that filter into a named view you can reopen anytime.

<figure><img src="/files/1G0XotbfNodo4puJ93ew" alt="The Create view dialog over a filtered journey maps list. It has a name field with a lock icon and a favorite star, a View type section with two radio options, Private view (selected) and Shared view, and Cancel and Create view buttons. Above the dialog, the active-filter bar shows a Tags filter pill, Clear all, and a Create view link."><figcaption><p>The Create view dialog</p></figcaption></figure>

{% stepper %}
{% step %}
**Apply the filter you want to save**

Filter the list down to the items you want the view to show. The view stores these filters, so set them before you save.
{% endstep %}

{% step %}
**Click Create view**

In the active-filter bar above the list, click **Create view**. The **Create view** dialog opens.
{% endstep %}

{% step %}
**Name the view and pick its type**

Type a name, then choose a **View type**:

* **Private view** - visible only to you. This is the default.
* **Shared view** - visible to everyone in the workspace.

To favorite the view as you create it, click the star in the name field.

{% hint style="info" icon="tag" %}

#### Shared views are Admin-only

Only admins can create a view that everyone in the workspace can see. If you're not an admin, the **Shared view** option is unavailable and you can save the view as private. \[VERIFY] the exact wording shown to a non-admin on the disabled **Shared view** option.
{% endhint %}
{% endstep %}

{% step %}
**Click Create view to save**

Click **Create view** in the dialog. The saved view appears in the list of views above the filters, ready to reapply.
{% endstep %}
{% endstepper %}

A favorited view appears on your **Dashboard** for quick access, so you can jump straight to a filtered list without reopening the filter.

***

#### How to edit and update a saved view

There are two separate things you can change about a view: its details (name, order, favorite status) and the filter it stores.

To edit a view's details, click the pen icon next to the saved views to open the management interface. From there you can rename a view, rearrange the order they appear in, favorite a view, or delete one.

To update the filter a view stores, select the view to apply it, change the filters (add or remove criteria), then click **Update view**. This overwrites the selected view's filters rather than creating a new one. To keep the original and save the changed filter separately, use **Create view** instead.

#### Related topics

<table data-column-title-hidden data-view="cards"><thead><tr><th>Article</th><th>What it covers</th><th data-hidden data-card-target data-type="content-ref">Target</th></tr></thead><tbody><tr><td><strong>How to filter a journey map</strong></td><td>Filter the content inside a map by lanes, personas, tags, or portfolio items.</td><td><a href="/pages/TvWyNP7bpL7PzUBbgLJ2">/pages/TvWyNP7bpL7PzUBbgLJ2</a></td></tr><tr><td><strong>How to save and apply a view</strong></td><td>Save an in-editor filter as a named view and reapply it on the map.</td><td><a href="/pages/0biJxUYNUHzaN0wxgwEg">/pages/0biJxUYNUHzaN0wxgwEg</a></td></tr><tr><td><strong>How to bulk-edit journey maps in the list</strong></td><td>Select maps from the list and tag, copy, or archive them in bulk.</td><td><a href="/pages/Rxjr00Vt6P1VkQEfRm2t">/pages/Rxjr00Vt6P1VkQEfRm2t</a></td></tr><tr><td><strong>How to use tags</strong></td><td>Apply tags across maps, cards, and personas so you can filter by them.</td><td><a href="/pages/jphiiSaFZL5tyD29Kfyt">/pages/jphiiSaFZL5tyD29Kfyt</a></td></tr></tbody></table>


---

# Agent Instructions
This documentation is published with GitBook. GitBook is the documentation platform designed so that both humans and AI agents can read, navigate, and reason over technical content effectively. Learn more at gitbook.com.

## Querying This Documentation
If you need additional information that is not directly available in this page, you can query the documentation dynamically by asking a question.

Perform an HTTP GET request on the current page URL with the `ask` query parameter, and the optional `goal` query parameter:

```
GET https://helpdesk.smaply.app/journey-maps/filtering-and-views/how-to-filter-and-save-list-views.md?ask=<question>&goal=<endgoal>
```

`ask` is the immediate question: it should be specific, self-contained, and written in natural language.
`goal` is optional and describes the broader end goal you are ultimately trying to accomplish on behalf of the user. GitBook uses it to tailor the answer towards what is most useful for that goal.

The response will contain a direct answer to the question and relevant excerpts and sources from the documentation.

Use this mechanism when the answer is not explicitly present in the current page, you need clarification or additional context, or you want to retrieve related documentation sections.