> For the complete documentation index, see [llms.txt](https://helpdesk.smaply.app/llms.txt). Markdown versions of documentation pages are available by appending `.md` to page URLs; this page is available as [Markdown](https://helpdesk.smaply.app/personas/how-to-edit-a-persona.md).

# How to edit a persona

Open a persona in the full-page editor to fill in its cards, restructure its layout, set its icon and color, and keep its description and tags current as you learn more about the customer.

{% hint style="info" icon="compass" %}
If you haven't built this persona yet, start with [How to create a persona](/personas/how-to-create-a-persona.md). This article picks up once a persona exists.
{% endhint %}

{% hint style="warning" icon="list-check" %}

#### Prerequisites

You need Editor or Admin access to edit personas.
{% endhint %}

{% hint style="info" icon="clipboard-list" %}

#### In this guide

1. [Open a persona for editing](#open-a-persona-for-editing)
2. [Change card content](#change-card-content)
3. [Add cards](#add-cards)
4. [Remove a card](#remove-a-card)
5. [Change the layout](#change-the-layout)
6. [Set the persona icon and color](#set-the-persona-icon-and-color)
7. [Edit the description, tags, and linked maps](#edit-the-description-tags-and-linked-maps)
   {% endhint %}

#### Open a persona for editing

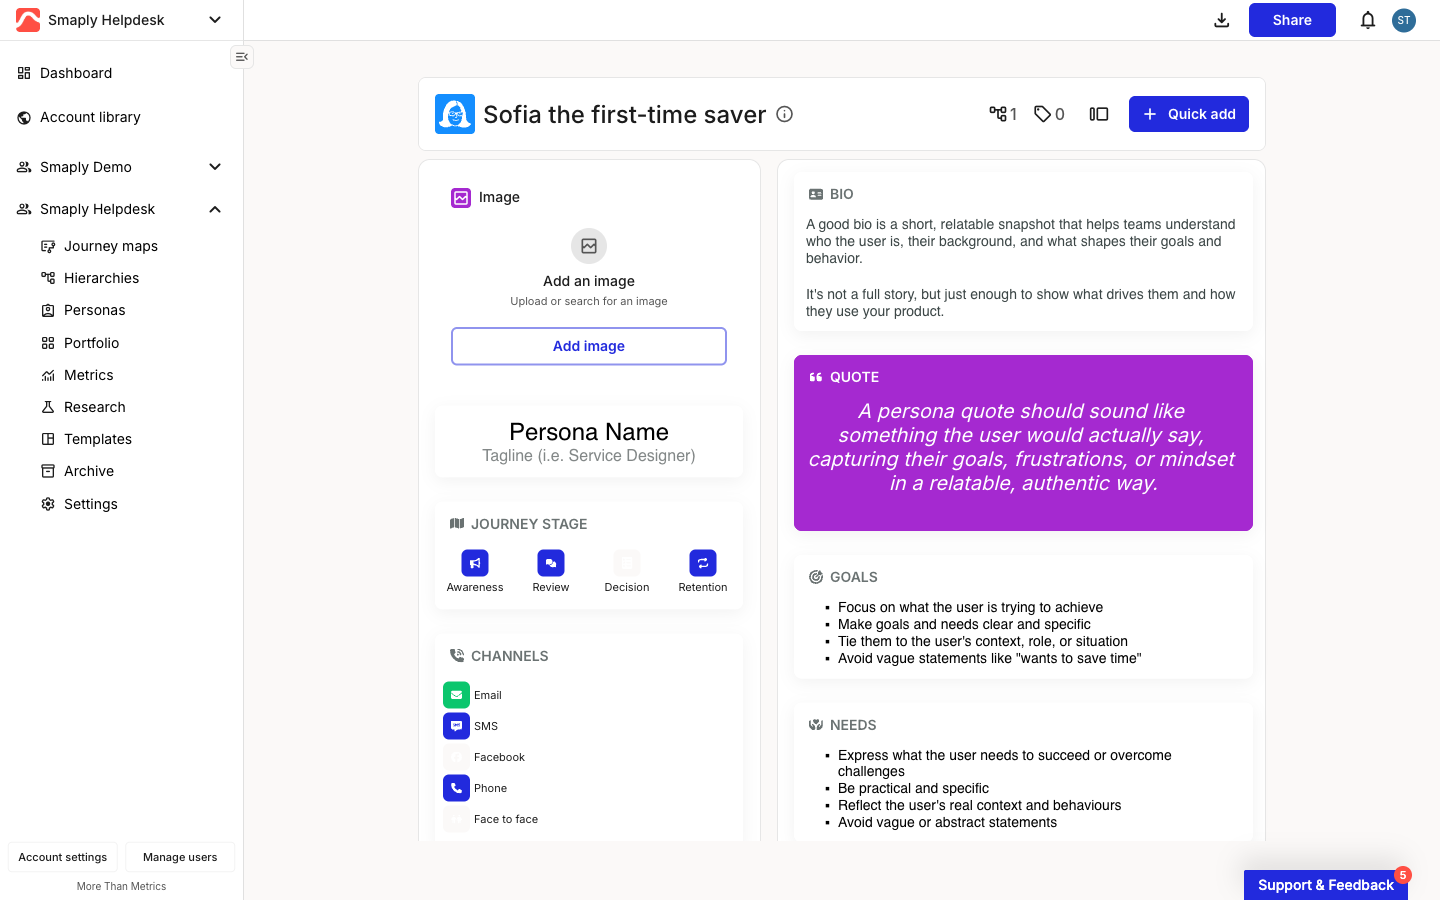
In the workspace sidebar, click **Personas**, then click the persona you want to edit. It opens in the full-page editor with its cards laid out across two columns.

<figure><img src="/files/Kb0FvMJLhf1OVMk5y1Ug" alt="The persona editor for &#x27;Sofia the first-time saver&#x27;. The app bar at the top right shows a download icon and a blue Share button. The persona header row below has the colored icon tile, name, and info icon on the left, with linked-map and tag counters, a layout toggle, and a Quick add button on the right. Cards are arranged in two columns: Image, Persona Name, Journey Stage, and Channels on the left; Bio, Quote, and Goals on the right."><figcaption><p>The persona editor</p></figcaption></figure>

Everything you change here saves automatically. There is no separate save step for card content, layout, or the info panel.

The top bar also has a **download** icon and a **Share** button: export the persona as a PDF, or share it with a read-only public link. See [How to share or export a persona](/sharing-and-exporting/how-to-share-or-export-a-persona.md).

***

#### Change card content

Click any card to edit it in place. Type into a text card, drag the handle on a slider card, swap the image on an image card, and the change saves as you go.

Persona cards use the same card model as journey map cards, so the floating toolbar, color and background options, and card details panel work the same way. For how a specific card type behaves, see the matching article under [How to add and edit cards](/journey-maps/cards/how-to-add-and-edit-cards.md): configuring a metric source, embedding external content, or setting up an icon card is covered there rather than repeated here.

***

#### Add cards

You can add cards two ways, depending on whether you want a ready-made section or a blank card of a specific type.

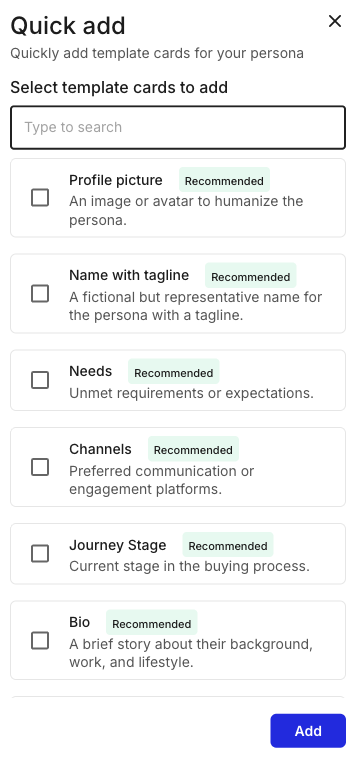
* **From the template list** - Click **+ Quick add** in the header to reopen the same template cards offered at creation (Profile picture, Bio, Goals, and so on). Search by name, tick the cards you want, and click **Add**. Nothing is pre-selected, so only what you tick is added.
* **From the card-type picker** - Add a blank card of a chosen type directly, the same way you add a card in a journey map.

<figure><img src="/files/T3mo9lCXvHlJLsnZhYDa" alt="The Quick add drawer titled &#x27;Quickly add template cards for your persona&#x27;. A &#x27;Select template cards to add&#x27; search field sits above a checklist of template cards (Profile picture, Name with tagline, Needs, Channels, Journey Stage, Bio), each marked Recommended, with empty checkboxes. An Add button is at the bottom right."><figcaption><p>+ Quick add, template cards</p></figcaption></figure>

The card-type picker groups the types available in personas:

* **Text** is the default and sits at the top of the picker.
* **Basic cards:** Image, Slider, Icons.
* **Advanced cards:** Embed, Metric, Planning.

<figure><img src="/files/NzMAUB3bDXuOVJUBwTI8" alt="The card-type picker. Text is at the top with an Enter shortcut. Under BASIC CARDS: Image, Slider, Icons. Under ADVANCED CARDS: Embed, Metric, Planning. A CUSTOM CARDS group begins below."><figcaption><p>Card-type picker, Basic and Advanced groups</p></figcaption></figure>

Stage, Portfolio item, and Linked journey cards are specific to journey maps and aren't available in personas.

***

#### Remove a card

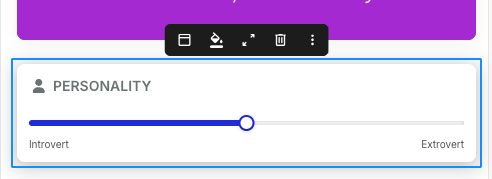
Click the card to select it, then click the trash icon (**Delete card**) in the floating toolbar that appears above it. The card is removed straight away, with no confirmation prompt, so remove only the card you mean to.

<figure><img src="/files/RG4EzwsLkRIdsZApfNsj" alt="A selected Personality slider card with its floating toolbar above it. The toolbar&#x27;s trailing icons include a card header toggle, fill color, expand, a trash icon for Delete card, and an overflow menu."><figcaption><p>Selected card with Delete card in the toolbar</p></figcaption></figure>

***

#### Change the layout

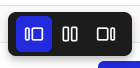
The layout sets the relative width of the persona's two columns. Click the layout toggle in the header to open the same three options offered at creation, and pick the one that fits your cards.

<figure><img src="/files/E80TnNgM8oKOg3KrDi1O" alt="The layout toggle expanded to show three options, each a two-pane icon: a narrow-left/wide-right pane, two equal panes, and a wide-left/narrow-right pane. The first option is selected."><figcaption><p>Layout toggle, three width options</p></figcaption></figure>

The three options are a narrow-then-wide split (good for short cards on the left and longer-form content on the right), two equal columns, and a wide-then-narrow split. Switching is non-destructive: your cards stay put and only the column widths change.

***

#### Set the persona icon and color

The persona's icon, color, and name all live in one modal. This is the only place to set the icon and color; the creation modal doesn't include them.

{% stepper %}
{% step %}
**Open the Persona edit modal**

Click the colored avatar tile to the left of the persona name in the header. The **Persona edit** modal opens.
{% endstep %}

{% step %}
**Pick an icon**

Under **Image**, choose an icon from the grid. It offers solid shapes and a set of face illustrations; the selected one is framed.
{% endstep %}

{% step %}
**Pick a color**

Under **Color**, click a swatch. Your workspace **Brand colors** appear as a separate row below the standard swatches. To rename the persona at the same time, edit the name field at the top of the modal.

<figure><img src="/files/nVKf7VwPosKy4mcETtb7" alt="The Persona edit modal. At the top, the current icon tile sits next to the persona name field (&#x27;Sofia the first-time saver&#x27;). An Image section shows a grid of icon choices (shapes and face illustrations) with one framed. A Color section shows two rows of swatches with one checked, and a Brand colors row below. Cancel and Save buttons are at the bottom right."><figcaption><p>Persona edit, icon and color</p></figcaption></figure>
{% endstep %}

{% step %}
**Click Save**

Click **Save** to apply the icon, color, and name. **Cancel** closes the modal without changing anything.
{% endstep %}
{% endstepper %}

***

#### Edit the description, tags, and linked maps

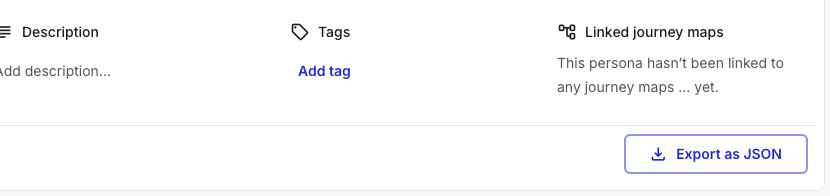
Click the info icon next to the persona name to open the collapsible info panel.

<figure><img src="/files/jQzw6pJTggNnOM6UjZRP" alt="The persona info panel open, showing an editable Description field, a Tags section with an Add tag link, and a Linked journey maps list."><figcaption><p>Persona info panel</p></figcaption></figure>

It holds three things:

* **Description** - A free-text summary of the persona. Click it to edit; it saves as you type.
* **Tags** - Click **Add tag** to label the persona. Tags are searchable and filterable from the Personas list.
* **Linked journey maps** - A read-only list of the journey maps where this persona is assigned to a card. To change what's here, assign or unassign the persona on a map. See [How to assign a persona to a card](/personas/how-to-assign-a-persona-to-a-card.md).

To delete the whole persona rather than a single card, use the three-dot menu on its row in the **Personas** list. That is permanent and separate from editing.

#### Related topics

<table data-column-title-hidden data-view="cards"><thead><tr><th>Title</th><th>Description</th><th data-hidden data-card-target data-type="content-ref">Target</th></tr></thead><tbody><tr><td><strong>Create a persona</strong></td><td>Start a new persona from the Customize persona modal and pick its template cards.</td><td><a href="/pages/q92JEZ67HauDof23i4mL">/pages/q92JEZ67HauDof23i4mL</a></td></tr><tr><td><strong>Assign a persona to a card</strong></td><td>Tag specific cards on a journey map with one or more personas.</td><td><a href="/pages/42b6nVolnvr4VE3kfJ6s">/pages/42b6nVolnvr4VE3kfJ6s</a></td></tr><tr><td><strong>Share or export a persona</strong></td><td>Create a read-only public link to a persona, or export it as a PDF.</td><td><a href="/pages/FJ6yN3C95BvKbdxz2fx1">/pages/FJ6yN3C95BvKbdxz2fx1</a></td></tr><tr><td><strong>Add and edit cards</strong></td><td>Card mechanics shared across journey maps and personas: the toolbar, details panel, and per-type cards.</td><td><a href="/pages/DI00pTOdaJmOwltHKgIa">/pages/DI00pTOdaJmOwltHKgIa</a></td></tr></tbody></table>


---

# Agent Instructions
This documentation is published with GitBook. GitBook is the documentation platform designed so that both humans and AI agents can read, navigate, and reason over technical content effectively. Learn more at gitbook.com.

## Querying This Documentation
If you need additional information that is not directly available in this page, you can query the documentation dynamically by asking a question.

Perform an HTTP GET request on the current page URL with the `ask` query parameter, and the optional `goal` query parameter:

```
GET https://helpdesk.smaply.app/personas/how-to-edit-a-persona.md?ask=<question>&goal=<endgoal>
```

`ask` is the immediate question: it should be specific, self-contained, and written in natural language.
`goal` is optional and describes the broader end goal you are ultimately trying to accomplish on behalf of the user. GitBook uses it to tailor the answer towards what is most useful for that goal.

The response will contain a direct answer to the question and relevant excerpts and sources from the documentation.

Use this mechanism when the answer is not explicitly present in the current page, you need clarification or additional context, or you want to retrieve related documentation sections.