
For the complete documentation index, see llms.txt. This page is also available as Markdown.

How to share or export a persona

Create a read-only public link to a persona or export it as a PDF to share outside Smaply.

Share a persona two ways: generate a read-only public link anyone can open in their browser, or export the persona as a PDF. Both start from the persona editor.

compass

Want a teammate to edit or comment instead? Invite them. See How to invite users.

Open the persona, then use the blue Share button in the editor's top bar. You can also start sharing from the Personas list by opening a persona's three-dot menu and selecting Share link (view-only), but the full controls (the URL, copy, password, and disable) live in the editor's Share dialog.

1

Open the persona and click Share

Open the persona, then click the blue Share button in the top bar. The download icon to its left is for PDF export.

The top bar of the persona editor showing a download icon on the left and a blue Share button on the right.
Persona editor top bar: export (left), Share (right)
2

Enable the link

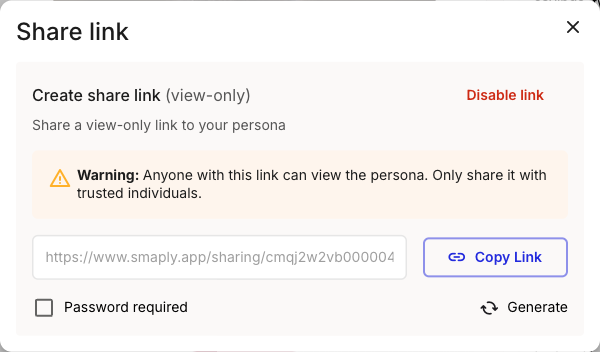
In the Share link dialog, click Enable on the Create share link (view-only) panel. Smaply generates a unique URL for this persona.

3

Copy the link

The Share link dialog with the link enabled, showing a warning that anyone with the link can view the persona, a read-only URL field, a Copy Link button, a Disable link action, and an unchecked Password required checkbox.
The Share link dialog once the link is enabled
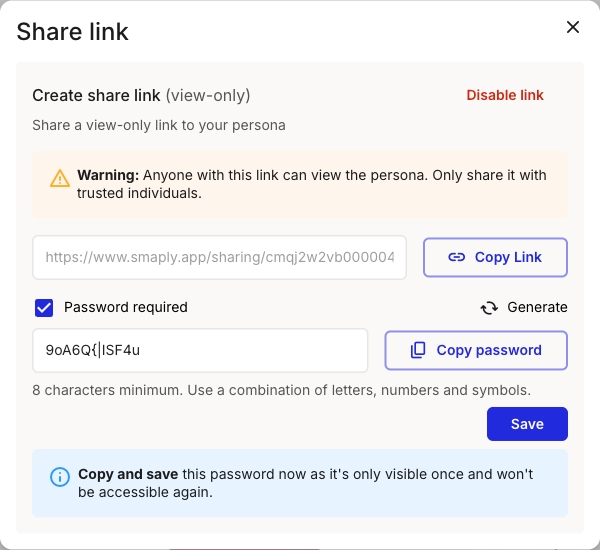
Click Copy Link and paste the URL wherever you're sharing it.

4

Optional: add password protection

Password protection is available on the Framework plan and above.

The Share link dialog with Password required ticked, showing a generated password, a Generate action, a Copy password button, the eight-character-minimum rule, a Save button, and a note that the password is only visible once.
Password required, with the Generate and Save controls
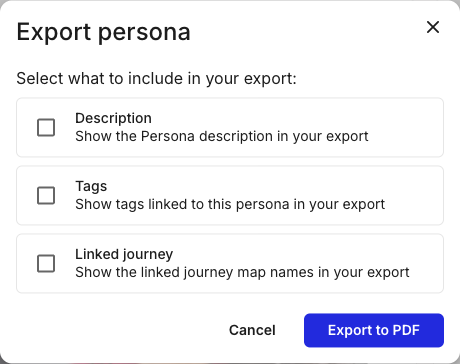
Tick Password required so viewers must enter a password before the persona loads. Click Generate for a compliant password or type your own, then click Save. Passwords need 8 characters minimum and a combination of letters, numbers, and symbols.

Important: Copy the password before you close the dialog

5

How to disable the link

To revoke access, click Disable link in the Share link dialog. Access stops immediately, and anyone who still has the URL sees an error instead of the persona.

The link opens a read-only version of the persona. Viewers don't need a Smaply account, and they can't edit anything.

The shared page is live, not a snapshot: viewers always see the persona's current state, so any edits you make show up the next time they open the link. There are no view analytics, so view counts and visitor details aren't tracked.

How to export a persona as a PDF

To export, open the persona, click the download icon in the editor's top bar, choose what to include, and click Export to PDF. PDF is the only export format.

1

Open the persona and click the download icon

Open the persona, then click the download icon in the top bar, to the left of Share. The Export persona modal opens.

2

Choose what to include

The Export persona modal with the subtitle Select what to include in your export and three unchecked checkboxes labelled Description, Tags, and Linked journey, each with a one-line explanation, plus Cancel and Export to PDF buttons.
Export persona, all options unchecked
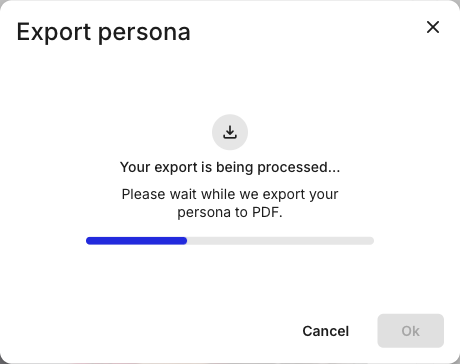
Tick the extras you want. All three are off by default, so an export with nothing ticked gives you the persona on its own:

  • Description - the persona description

  • Tags - the tags linked to this persona

  • Linked journey - the names of the journey maps this persona is used on

3

Export and wait for the download

Click Export to PDF. The modal shows Your export is being processed with a progress bar while Smaply builds the file.

The Export persona modal showing a download icon, the text Your export is being processed, a message to please wait, and a progress bar.
Stay on the page until the export finishes
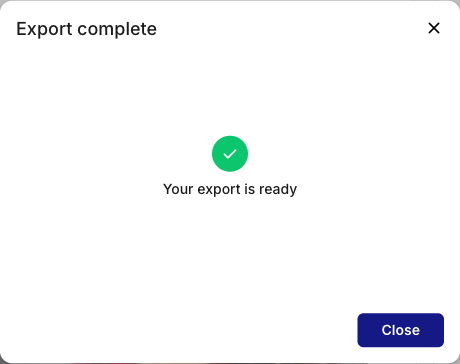
When the file is ready, the PDF downloads automatically and an Export complete dialog appears. Click Close to dismiss it.

The Export complete dialog showing a green checkmark, the text Your export is ready, and a Close button.
The PDF downloads on its own once it's ready

If your account has a branding logo configured, it appears on the PDF. To set or change it, see How to set up custom branding.

Last updated