> For the complete documentation index, see [llms.txt](https://helpdesk.smaply.app/llms.txt). Markdown versions of documentation pages are available by appending `.md` to page URLs; this page is available as [Markdown](https://helpdesk.smaply.app/journey-maps/cards/how-to-use-shape-cards.md).

# How to use shape cards

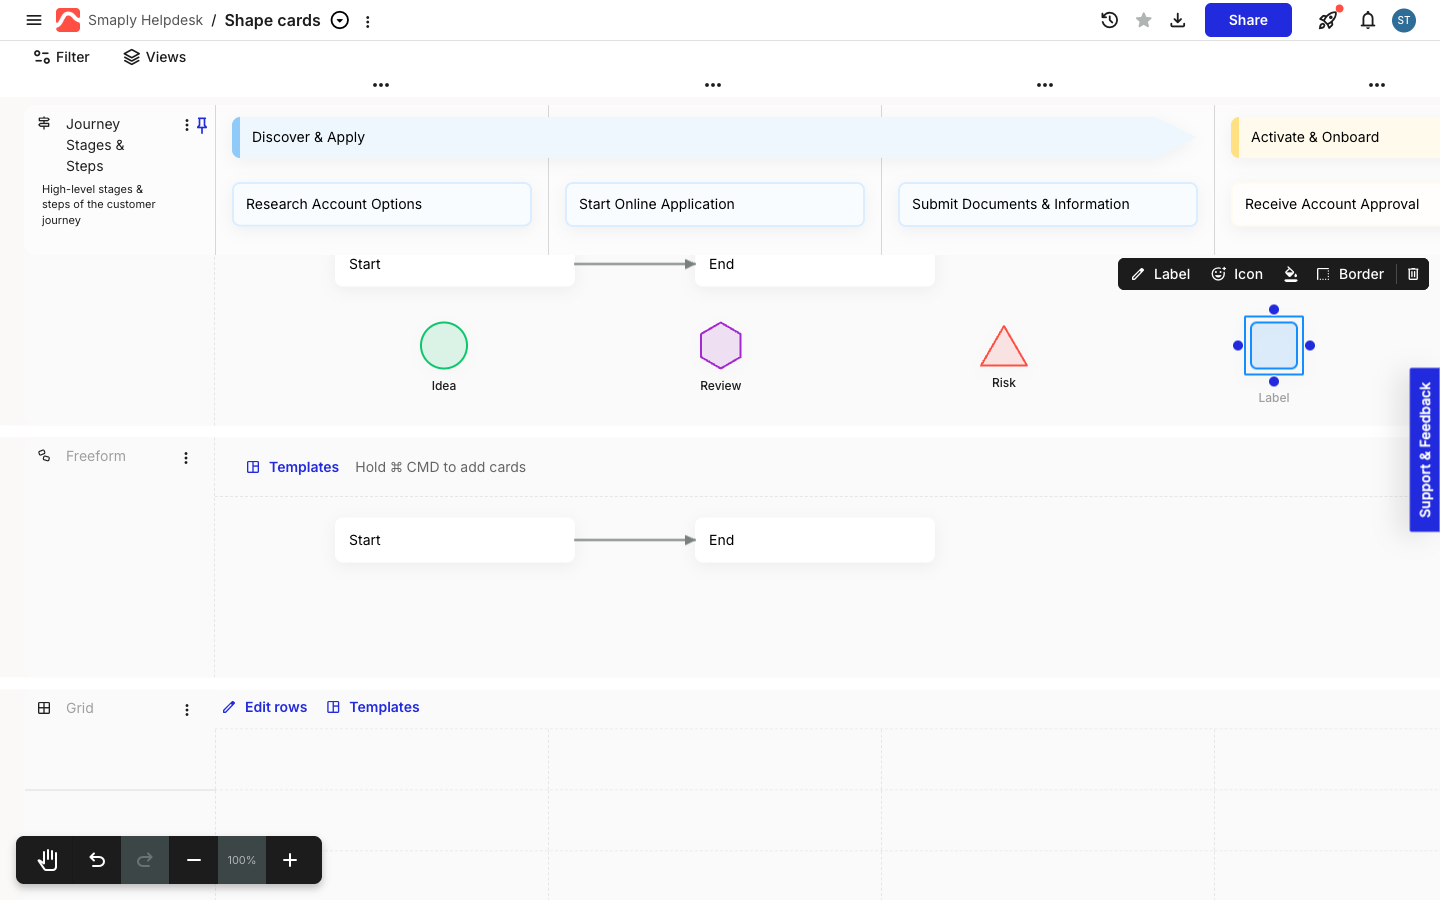
Build a flowchart inside a journey map with square, diamond, circle, triangle, hexagon, and pill shapes joined by arrows.

A shape card is a single diagram node. Use a diamond where a process branches and a pill where it starts or ends, then join them with connector arrows.

<figure><img src="https://1197101183-files.gitbook.io/~/files/v0/b/gitbook-x-prod.appspot.com/o/spaces%2For99xDEElfps9uMDY60K%2Fuploads%2F1CPoqNtMGDk7CZtxXanK%2Fimage.png?alt=media&amp;token=56b675e1-f23a-4482-9e9c-bfdaea9001cc" alt=""><figcaption></figcaption></figure>

{% hint style="info" icon="tag" %}
Shape cards live in flow and freeform lanes, which are available on the **Repository** plan and above.
{% endhint %}

{% hint style="info" icon="clipboard-list" %}

#### In this guide

1. [How to add a shape card to a flow or freeform lane](#how-to-add-a-shape-card-to-a-flow-or-freeform-lane)
2. [How to set a shape's label](#how-to-set-a-shapes-label)
3. [How to put an icon inside a shape](#how-to-put-an-icon-inside-a-shape)
4. [How to set a shape's colour, background, and border](#how-to-set-a-shapes-colour-background-and-border)
5. [How to connect shapes with arrows](#how-to-connect-shapes-with-arrows)
6. [How to start a shape flowchart from a flow lane template](#how-to-start-a-shape-flowchart-from-a-flow-lane-template)
7. [What shape cards can't do](#what-shape-cards-cant-do)
   {% endhint %}

***

#### How to add a shape card to a flow or freeform lane

Shape cards are only offered in flow lanes and freeform lanes. The card picker in a text lane, a grid lane, or any other lane type has no shapes in it.

In both lane types, adding a card takes a modifier key, because plain clicking and dragging draws a connector:

* **In a flow lane** - hold **Cmd** (Mac) or **Ctrl** (Windows), hover an empty cell, and click **+ Add card**.
* **In a freeform lane** - hold **Cmd** (Mac) or **Ctrl** (Windows) and click any spot on the canvas.

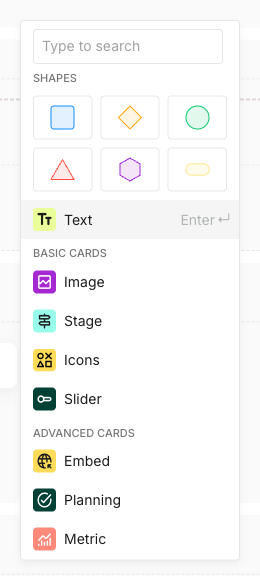
**SHAPES** is the first group in the picker that opens, above the **Text** quick-select, laid out as a grid of six swatches rather than a labelled row: **Square**, **Diamond**, **Circle**, **Triangle**, **Hexagon**, and **Pill**. Hover a swatch to see its name. For the rest of the picker and the shared add-card mechanics, see [How to add and edit cards](/journey-maps/cards/how-to-add-and-edit-cards.md).

<figure><img src="https://1197101183-files.gitbook.io/~/files/v0/b/gitbook-x-prod.appspot.com/o/spaces%2For99xDEElfps9uMDY60K%2Fuploads%2Fgit-blob-907e7f9309e74b4c14e7b8fdee5b02b04d633afa%2Fjourney-maps-shape-cards-01-picker-flow-lane-crop.png?alt=media" alt="The add-card picker with a SHAPES group at the top, laid out as a three-by-two grid of swatches: a blue square, an orange diamond, and a green circle on the first row, a red triangle, a purple hexagon, and a yellow pill on the second. Below it, the Text quick-select with an Enter hint, then BASIC CARDS with Image, Stage, Icons, and Slider, and ADVANCED CARDS with Embed, Planning, and Metric."><figcaption><p>SHAPES sits above the Text quick-select in the picker</p></figcaption></figure>

Click a swatch to drop that shape straight into the lane. There's no second step and no sub-menu. In a freeform lane the shape lands exactly where you clicked, so you can spread a diagram across the canvas instead of following the columns.

{% hint style="warning" %}

#### **Important: One shape can't be changed into another**

Nothing on the toolbar turns a square into a diamond. Delete the card with the trash icon and add the shape you want instead.
{% endhint %}

***

#### How to set a shape's label

A shape card carries a label underneath the shape rather than text inside it, and typing while the shape is selected does nothing. A new shape arrives with the placeholder **Label**.

<figure><img src="https://1197101183-files.gitbook.io/~/files/v0/b/gitbook-x-prod.appspot.com/o/spaces%2For99xDEElfps9uMDY60K%2Fuploads%2Fgit-blob-b41cb8dac376f42812bf54d1ac6b3af599144219%2Fjourney-maps-shape-cards-04-shape-added-default.png?alt=media" alt="A newly added blue square shape card selected in a lane, showing its placeholder label reading Label underneath and its floating toolbar above showing Label, Icon, a paint bucket, Border, and a trash icon."><figcaption><p>A new shape card, with its placeholder label</p></figcaption></figure>

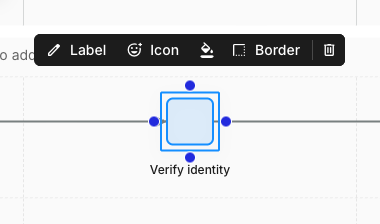
Select the shape and click **Label** on the floating toolbar, then type into the box that opens below the shape. Click anywhere outside the box to commit what you typed. Pressing Escape cancels the edit and leaves the previous label in place.

<figure><img src="https://1197101183-files.gitbook.io/~/files/v0/b/gitbook-x-prod.appspot.com/o/spaces%2For99xDEElfps9uMDY60K%2Fuploads%2Fgit-blob-aa2d96c90882167ae882f8193301be94bd3518b6%2Fjourney-maps-shape-cards-05-toolbar-crop.png?alt=media" alt="A selected blue square shape card labelled Verify identity, with its floating toolbar above showing Label, Icon, a paint bucket, Border, and a trash icon."><figcaption><p>The toolbar on a selected shape card</p></figcaption></figure>

***

#### How to put an icon inside a shape

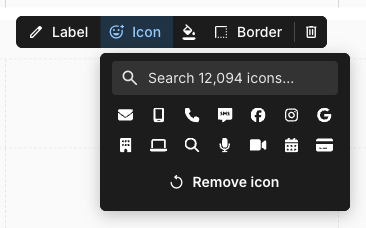
Click **Icon** on the toolbar and pick one of the suggested icons, or search the library by name. The icon sits inside the shape and the label stays underneath it, which is how you mark a node as a message, a check, or a failure without writing it out. Click **Remove icon** to clear it again.

<figure><img src="https://1197101183-files.gitbook.io/~/files/v0/b/gitbook-x-prod.appspot.com/o/spaces%2For99xDEElfps9uMDY60K%2Fuploads%2Fgit-blob-b4c3c15c8830bf1b727af70c8075798773cf1a04%2Fjourney-maps-shape-cards-09-icon-picker-crop.png?alt=media" alt="The icon picker open from a shape card&#x27;s toolbar, with a search field reading Search 12,094 icons, two rows of suggested icons including an envelope, a phone, a camera, and a calendar, and a Remove icon button at the bottom."><figcaption><p>The icon picker on a shape card</p></figcaption></figure>

***

#### How to set a shape's colour, background, and border

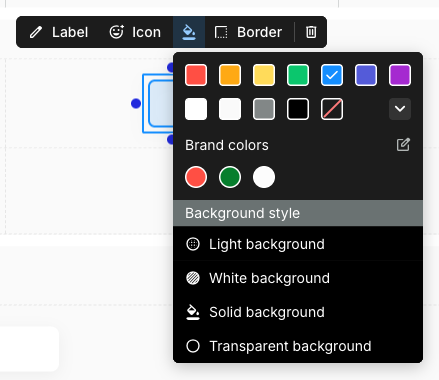
The paint bucket on the toolbar opens the same picker as any other card, with the accent colour grid, **Brand colors**, and the four **Background style** options. A shape can be a solid block of colour, a pale tint, or an outline on a transparent fill. See [Card color and background style](/journey-maps/cards/how-to-add-and-edit-cards.md#card-color-and-background-style) for how the styles differ.

<figure><img src="https://1197101183-files.gitbook.io/~/files/v0/b/gitbook-x-prod.appspot.com/o/spaces%2For99xDEElfps9uMDY60K%2Fuploads%2Fgit-blob-eeadd6acd6e4691f4efcc2615d8a8e2329d1d398%2Fjourney-maps-shape-cards-07-fill-picker-crop.png?alt=media" alt="The colour picker open from a shape card&#x27;s toolbar, showing an accent colour grid, a Brand colors section with three swatches, and a Background style list with Light background, White background, Solid background, and Transparent background."><figcaption><p>Colour and background style on a shape card</p></figcaption></figure>

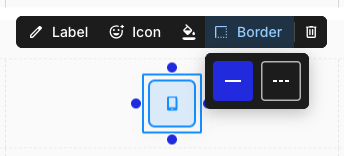
**Border** is specific to shape cards. Click it and choose the solid or dashed line. Solid is the default, and a dashed outline reads well for a step that's optional, out of scope, or not yet agreed.

<figure><img src="https://1197101183-files.gitbook.io/~/files/v0/b/gitbook-x-prod.appspot.com/o/spaces%2For99xDEElfps9uMDY60K%2Fuploads%2Fgit-blob-ace4b071335bf4a5fa63299d9f6a125833b6c1ab%2Fjourney-maps-shape-cards-08-border-menu-crop.png?alt=media" alt="The Border menu open from a shape card&#x27;s toolbar, offering two options: a solid line, currently selected and highlighted blue, and a dashed line."><figcaption><p>Border: a solid or dashed line</p></figcaption></figure>

***

#### How to connect shapes with arrows

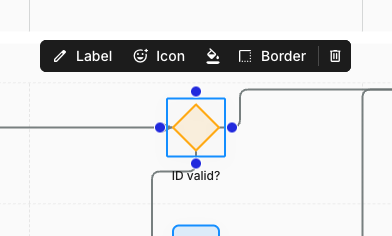
Connectors come from the lane, not from the card, so a shape connects exactly like an ordinary card. Click a shape to show its four attach points, one at the middle of each edge, then drag from an attach point onto the card you want the arrow to point at.

<figure><img src="https://1197101183-files.gitbook.io/~/files/v0/b/gitbook-x-prod.appspot.com/o/spaces%2For99xDEElfps9uMDY60K%2Fuploads%2Fgit-blob-55a59e1c75f3fef80255d8424ea0fb018ecbf02a%2Fjourney-maps-shape-cards-06-selected-connectors-crop.png?alt=media" alt="A selected orange diamond shape card labelled ID valid?, showing four blue connector attach points at the middle of its top, right, bottom, and left edges, with connector arrows already running to and from it."><figcaption><p>A selected shape shows the same four attach points as any other card</p></figcaption></figure>

Shapes and ordinary cards connect to each other freely, so a diamond can branch out to a text card and back again. For drawing, re-routing, and removing connectors, see [How to use flow lanes](/journey-maps/lanes/how-to-use-flow-lanes.md). For the same arrows on an open canvas, see [How to use freeform lanes](/journey-maps/lanes/how-to-use-freeform-lanes.md).

***

#### How to start a shape flowchart from a flow lane template

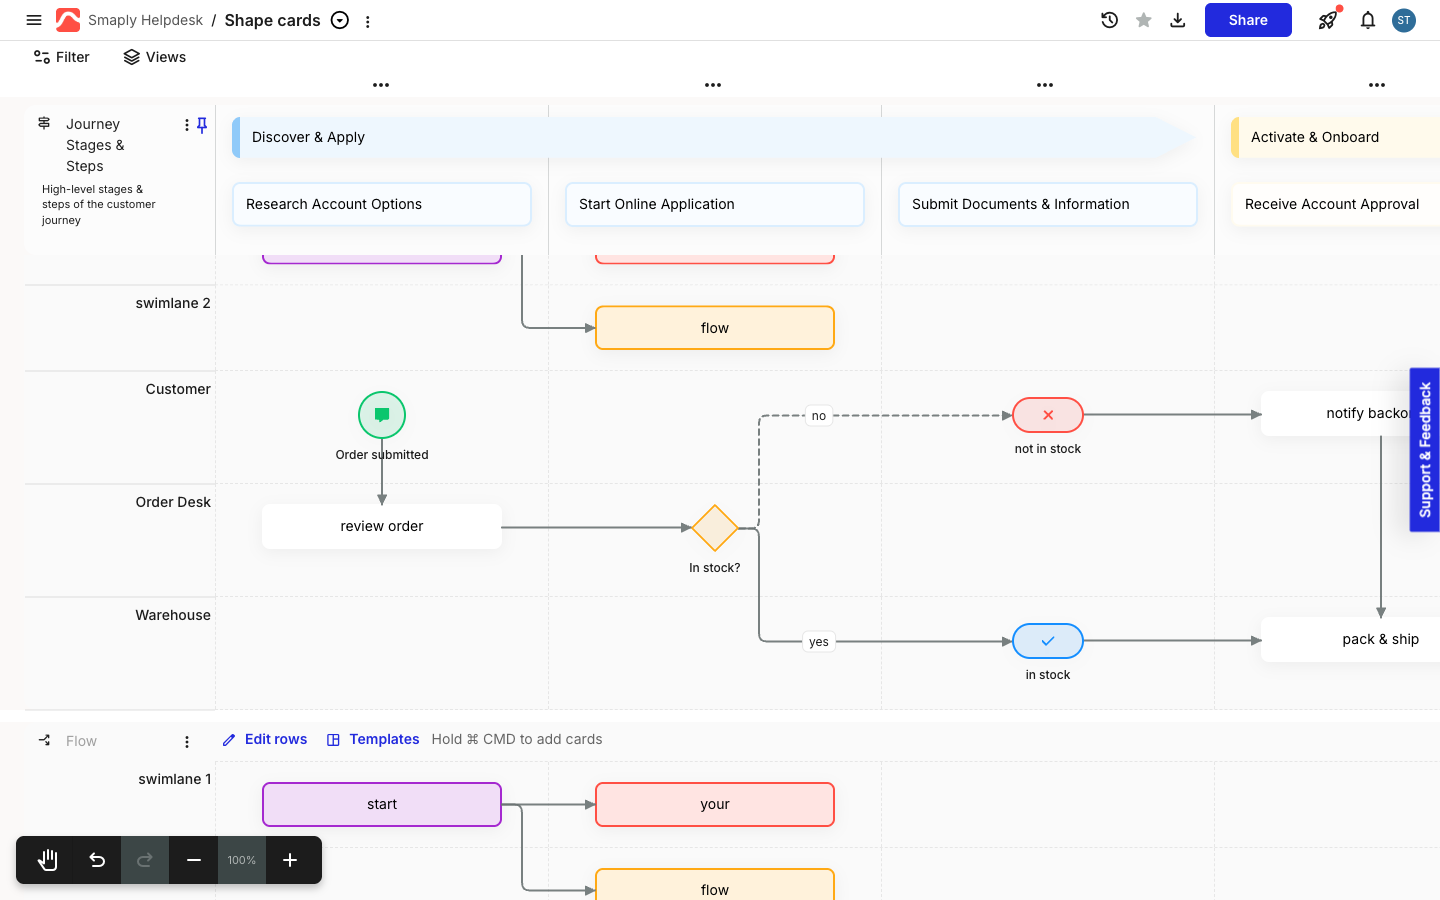
Two of the flow lane templates are built from shape cards. **BPMN** lays out swimlanes of shape nodes with labelled and dashed connectors, and **Decision tree** branches diamonds into outcome squares. Both get you a working diagram faster than placing every node yourself, and every shape in them stays editable. Click **Templates** in the lane header to pick one, and see [How to use flow lanes](/journey-maps/lanes/how-to-use-flow-lanes.md) for what the other templates do.

<figure><img src="https://1197101183-files.gitbook.io/~/files/v0/b/gitbook-x-prod.appspot.com/o/spaces%2For99xDEElfps9uMDY60K%2Fuploads%2Fgit-blob-1df44de55adfa8f72157c3b3b15dbac4b85ecd07%2Fjourney-maps-shape-cards-14-bpmn-template-applied.png?alt=media" alt="A flow lane after the BPMN template is applied, with Customer, Order Desk, and Warehouse swimlanes. A green circle with a message icon labelled Order submitted points to a white card reading review order, which points to an orange diamond labelled In stock?. A dashed connector labelled no runs to a red pill with a cross labelled not in stock, and a solid connector labelled yes runs to a blue pill with a tick labelled in stock."><figcaption><p>The BPMN template, built from shape cards and plain cards on one connector chain</p></figcaption></figure>

{% hint style="warning" %}

#### **Important: A template adds to a lane, it doesn't replace what's there**

Applying **BPMN** or **Decision tree** to a lane that already holds cards keeps those cards and adds the template's swimlanes below them, and it renames the lane after the template. Apply a template to a fresh flow lane.
{% endhint %}

***

#### What shape cards can't do

A shape card is minimal: a label, an optional icon, a colour and background, and a border style are the whole feature set, and there's no card details panel behind them. Compared with an ordinary card, a shape card has no:

* text formatting, since the label is plain text with no bold, size, font, or list controls
* **Card header**
* details panel, and so no **Personas**, **Card tags**, or **Comments**
* **Duplicate**, **Copy**, **Expand**, **Shrink**, or **Height**, and no three-dot menu to hold them
* place in **Change card type**, in either direction, so a text card can't become a shape and a shape can't become anything else

If a node in your diagram needs tags, personas, or comments, use an ordinary card for that node and connect it to the shapes around it. The **BPMN** template does exactly this, mixing plain cards into the same connector chain as its shapes. For everything an ordinary card can do, see [How to add and edit cards](/journey-maps/cards/how-to-add-and-edit-cards.md).

***

#### Related topics

<table data-column-title-hidden data-view="cards"><thead><tr><th>Title</th><th>Description</th><th data-hidden data-card-target data-type="content-ref">Target</th></tr></thead><tbody><tr><td><strong>How to use flow lanes</strong></td><td>Draw, re-route, and remove the connectors between shapes, and use the BPMN and Decision tree templates.</td><td><a href="/journey-maps/lanes/how-to-use-flow-lanes.md">Flow lanes</a></td></tr><tr><td><strong>How to use freeform lanes</strong></td><td>Place shapes anywhere on an open canvas instead of on the column grid.</td><td><a href="/journey-maps/lanes/how-to-use-freeform-lanes.md">Freeform lanes</a></td></tr><tr><td><strong>How to add and edit cards</strong></td><td>Parent how-to for shared card mechanics: toolbar, details panel, colours, and headers.</td><td><a href="/journey-maps/cards/how-to-add-and-edit-cards.md">Add and edit cards</a></td></tr><tr><td><strong>How to add and manage lanes</strong></td><td>Add the flow or freeform lane your shape cards need before you add them.</td><td><a href="/journey-maps/lanes/how-to-add-and-manage-lanes.md">Add and manage lanes</a></td></tr><tr><td><strong>How to change a card's type</strong></td><td>Which card types convert into which, and why the rest don't offer conversion.</td><td><a href="/journey-maps/how-to-change-a-cards-type.md">Change a card's type</a></td></tr></tbody></table>


---

# Agent Instructions
This documentation is published with GitBook. GitBook is the documentation platform designed so that both humans and AI agents can read, navigate, and reason over technical content effectively. Learn more at gitbook.com.

## Querying This Documentation
If you need additional information that is not directly available in this page, you can query the documentation dynamically by asking a question.

Perform an HTTP GET request on the current page URL with the `ask` query parameter, and the optional `goal` query parameter:

```
GET https://helpdesk.smaply.app/journey-maps/cards/how-to-use-shape-cards.md?ask=<question>&goal=<endgoal>
```

`ask` is the immediate question: it should be specific, self-contained, and written in natural language.
`goal` is optional and describes the broader end goal you are ultimately trying to accomplish on behalf of the user. GitBook uses it to tailor the answer towards what is most useful for that goal.

The response will contain a direct answer to the question and relevant excerpts and sources from the documentation.

Use this mechanism when the answer is not explicitly present in the current page, you need clarification or additional context, or you want to retrieve related documentation sections.