> For the complete documentation index, see [llms.txt](https://helpdesk.smaply.app/llms.txt). Markdown versions of documentation pages are available by appending `.md` to page URLs; this page is available as [Markdown](https://helpdesk.smaply.app/journey-maps/lanes/how-to-use-flow-lanes.md).

# How to use flow lanes

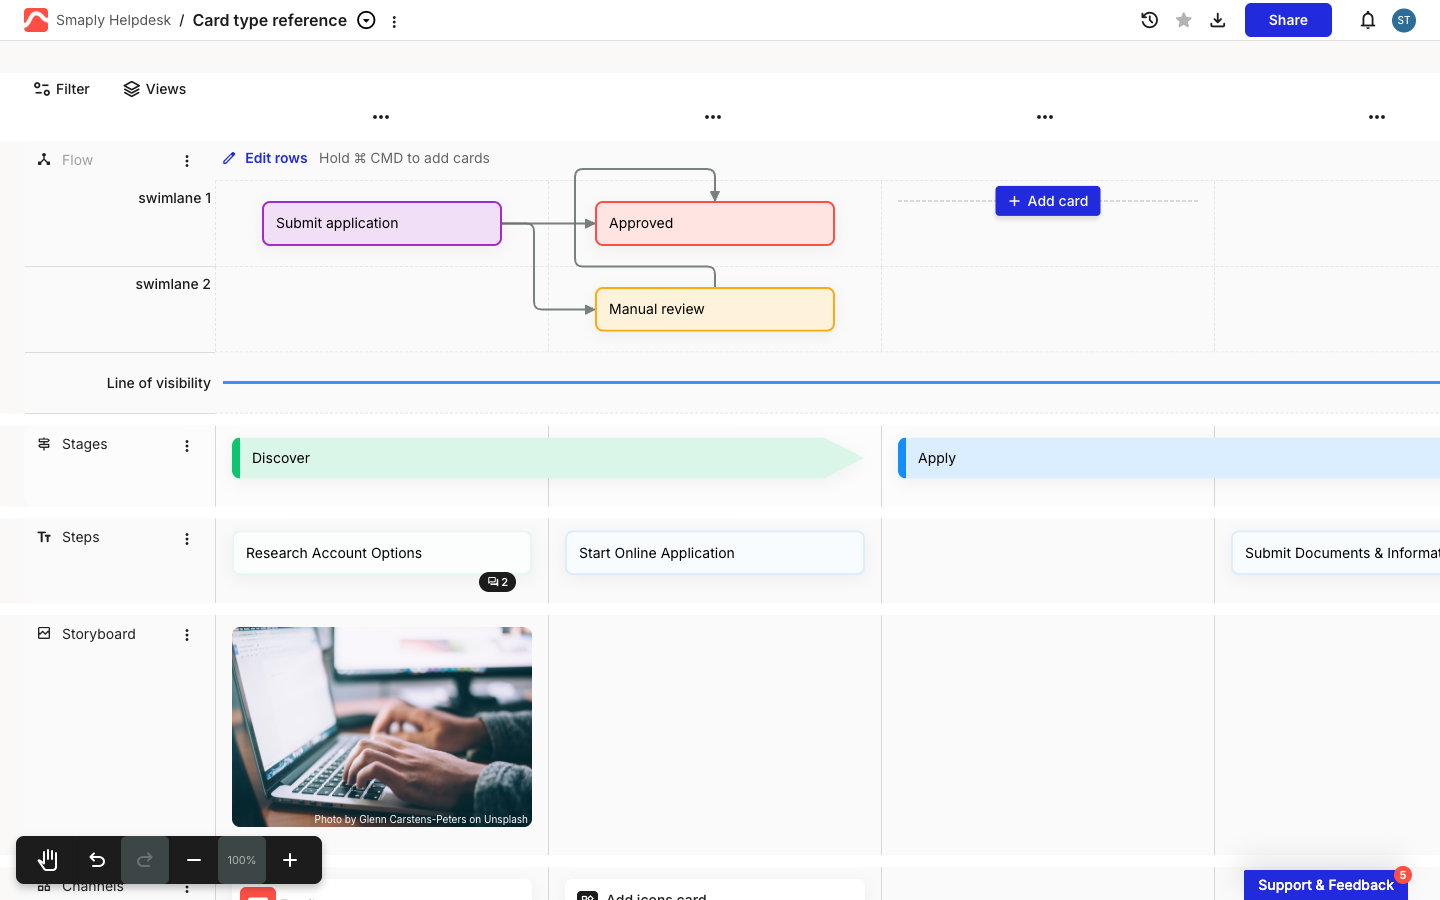
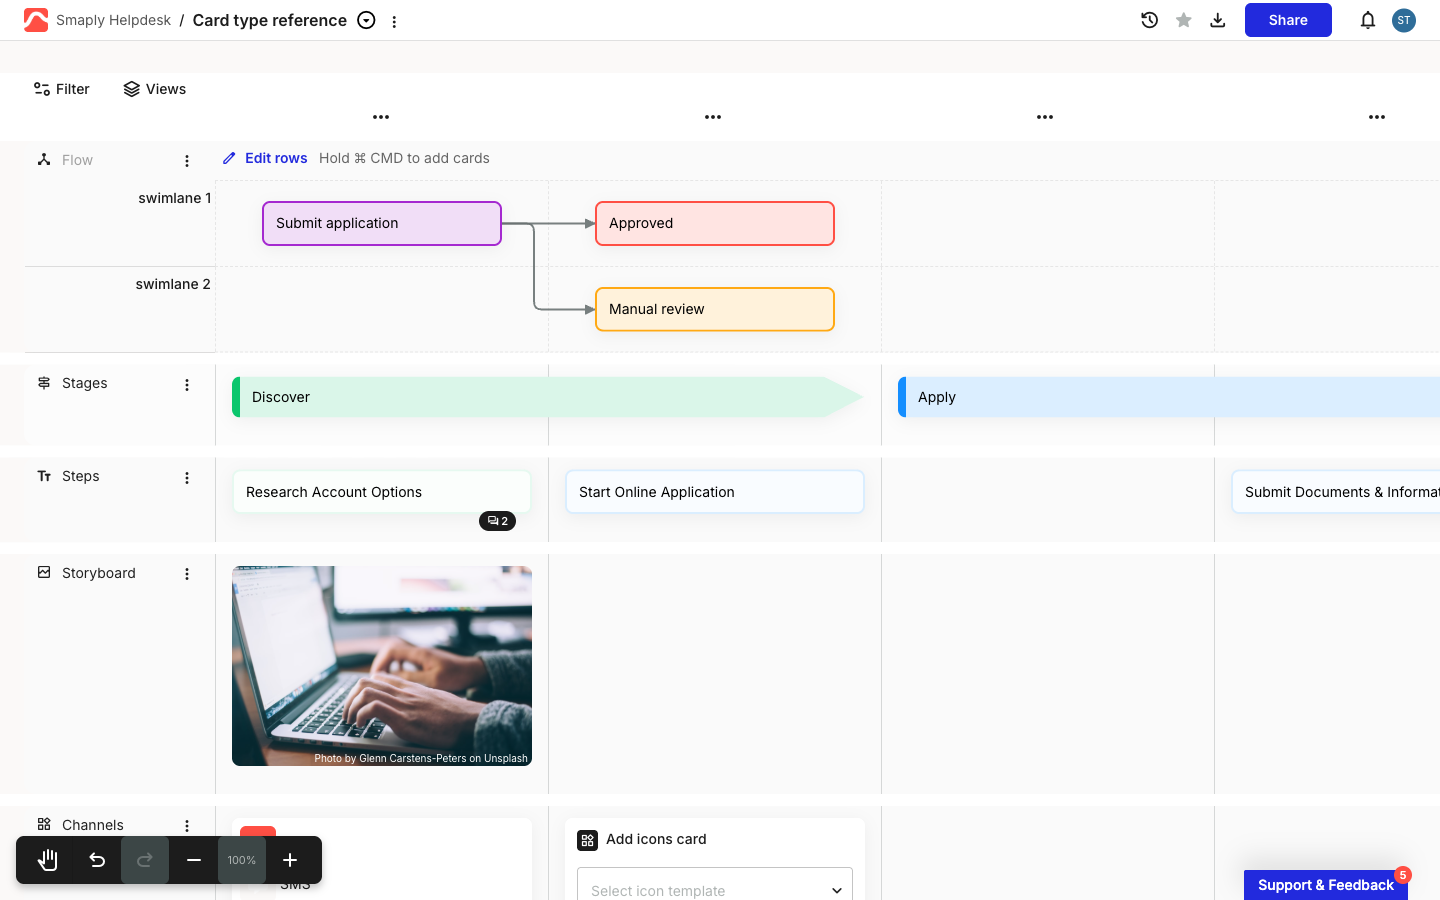
A flow lane shows how one step leads to the next. It works like a grid lane, split into named rows (swimlanes) that cross your map's columns, with one extra ability: you draw connector arrows from card to card to trace a process, sequence, or decision flow. It is the lane type for service blueprints, system and process flows, decision trees, and dependency maps.

<figure><img src="/files/Z5q7FQ2Ev6OEJC33bfDw" alt="A journey map with a flow lane at the top. Two swimlanes hold three cards, Submit application, Approved, and Manual review, joined by grey connector arrows. An Edit rows link and a Hold Cmd to add cards hint sit in the lane header."><figcaption><p>A flow lane: cards in swimlanes, joined by connector arrows</p></figcaption></figure>

{% hint style="info" icon="tag" %}
Flow lanes are available on the Repository plan and above.
{% endhint %}

Here is a quick tour of flow lanes in action before the step-by-step below.

{% embed url="<https://www.youtube.com/watch?v=btPZpN7pEvs>" %}

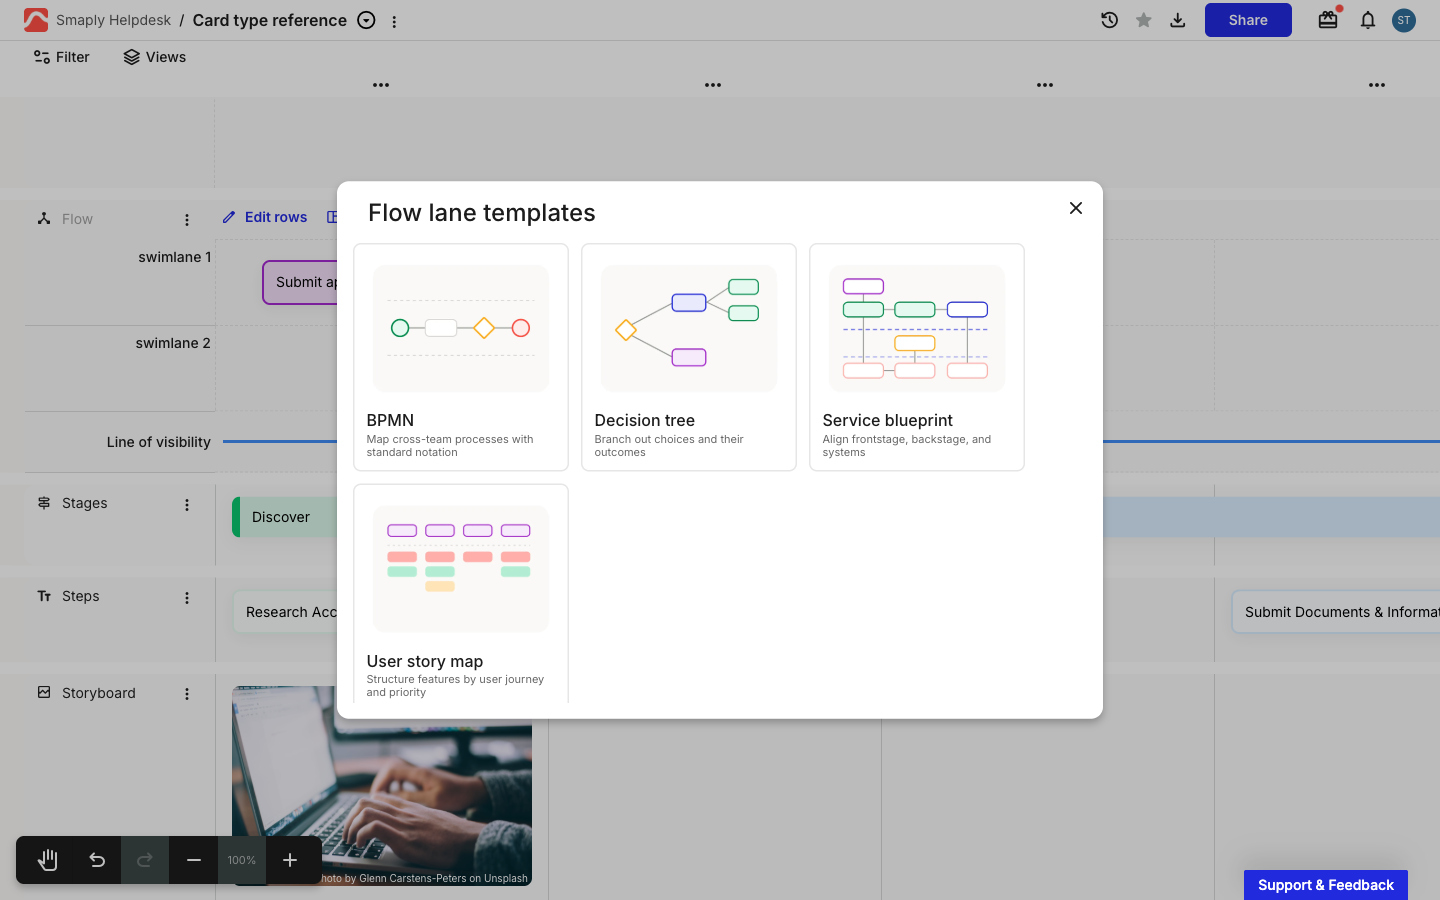
To add a flow lane, use the **+ Add lane** picker and choose **Flow** under **BASIC LANES**, the same way you add any other lane. A new flow lane arrives with a small starter example (a couple of swimlanes, a few cards, and connectors) that you can edit or replace. See [How to add and manage lanes](/journey-maps/lanes/how-to-add-and-manage-lanes.md) for the full add and manage flow.

***

#### How to add cards to a flow lane

In a flow lane, clicking and dragging draws connectors, so adding a card uses a modifier key to keep the two actions apart. Hold **Cmd** (Mac) or **Ctrl** (Windows) and hover an empty cell to reveal a **+ Add card** button, then click it to add a card. The lane header shows the reminder **Hold ⌘ CMD to add cards**. The connectors step out of the way while you add, so you can drop a card without catching a connector.

<figure><img src="/files/LqQVwtmXnCdhqhvIMbJs" alt="A flow lane with the Cmd key held, showing a blue + Add card button in an empty cell so a card can be added without drawing a connector."><figcaption><p>Hold Cmd or Ctrl to reveal + Add card in an empty cell</p></figcaption></figure>

Cards live where a swimlane meets a column, the same as a grid lane, and a cell can hold cards of any type. Adding and editing card content works the same as anywhere else on the map. See [How to add and edit cards](/journey-maps/cards/how-to-add-and-edit-cards.md) for the shared card mechanics.

***

#### How to connect cards

Connectors run from card to card within the same flow lane. They cannot connect to cards in another lane, but inside the lane they run from any edge to any edge, in any direction, and can cross swimlanes and span columns.

{% stepper %}
{% step %}
**Select the card to connect from**

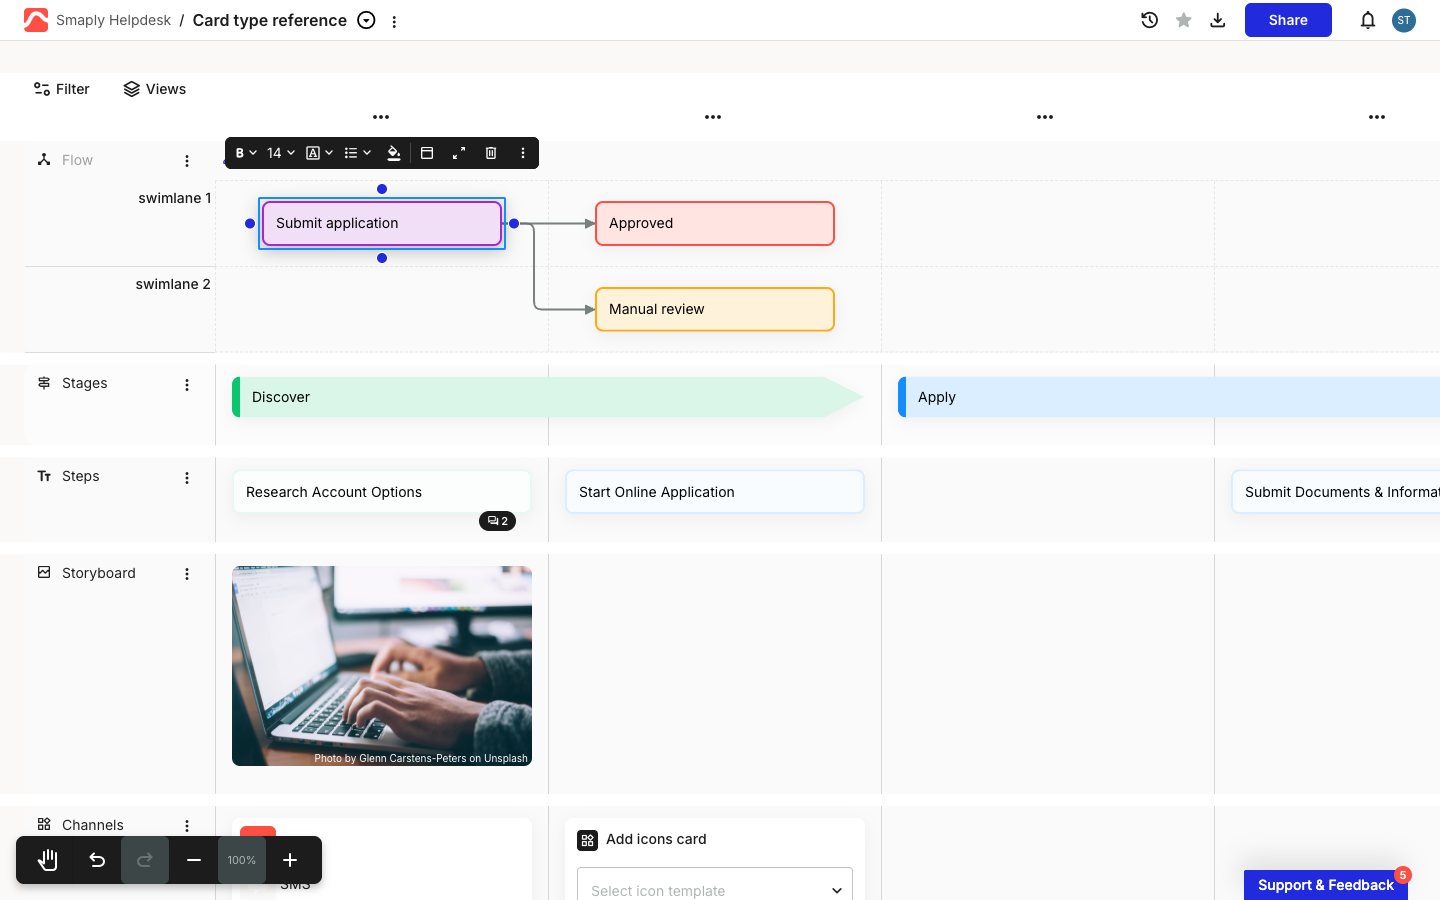
Click a card. It shows a blue selection border and four connector attach points, one at the middle of each edge (top, bottom, left, and right).

<figure><img src="/files/nKnDQGPZfsoeVqY4pCsu" alt="A selected flow card, Submit application, showing four blue connector attach points at its top, bottom, left, and right edges, with the card toolbar above."><figcaption><p>Click a card to show its four connector attach points</p></figcaption></figure>
{% endstep %}

{% step %}
**Drag from an attach point to another card**

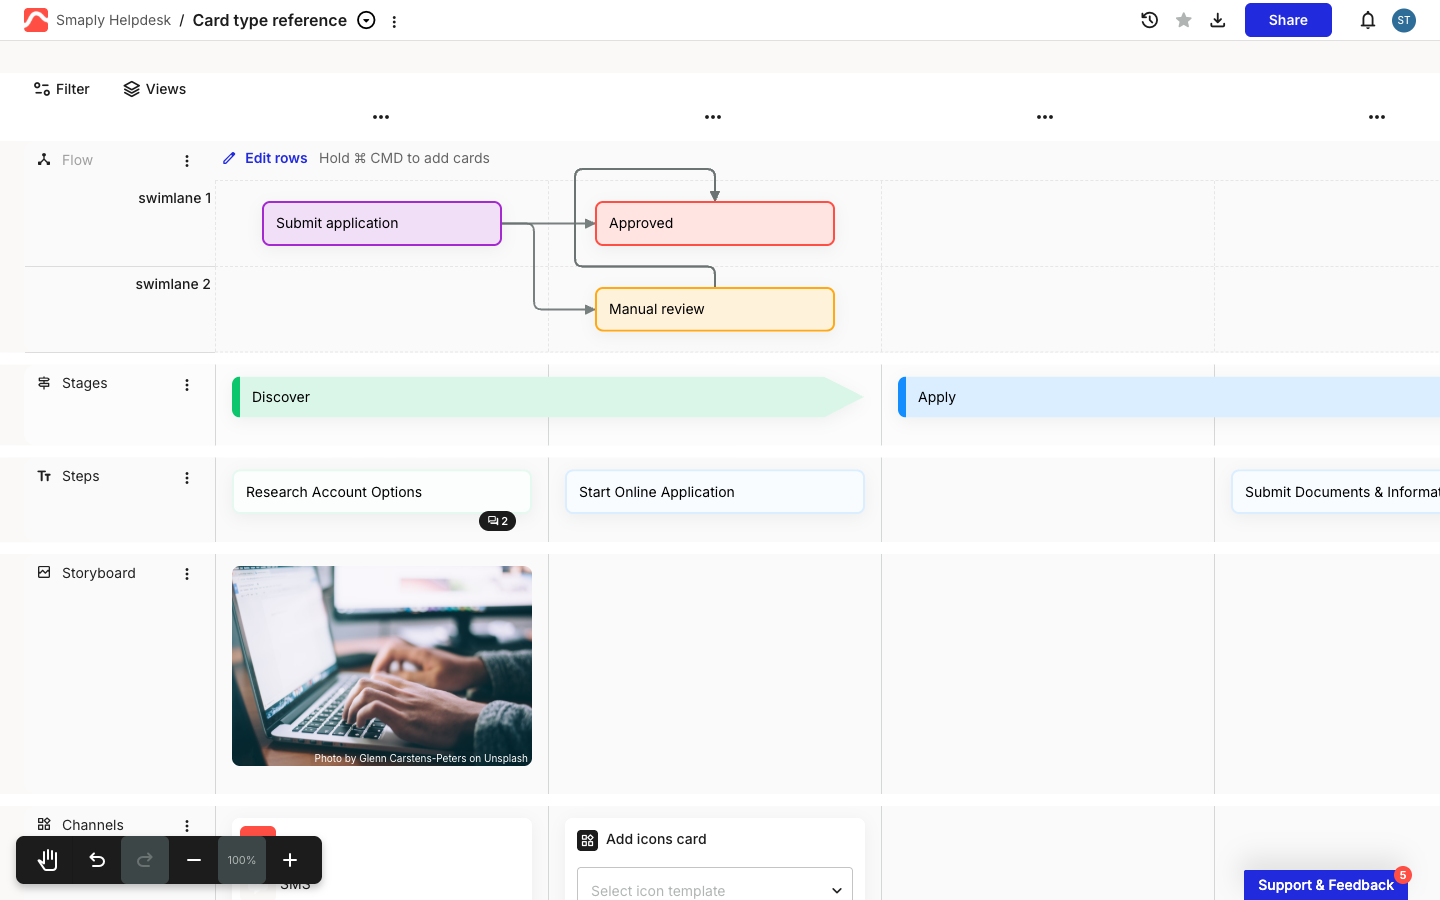
Drag from one of the attach points onto the card you want to connect to, and release. Smaply draws an arrow from the first card to the second, with the arrowhead at the target. Repeat to branch a card to more than one destination.

<figure><img src="/files/WTh20txoNcXcN4jCi5aY" alt="Three flow cards joined by connector arrows. Submit application points to both Approved and Manual review, and Manual review now points to Approved."><figcaption><p>The new connector, drawn from Manual review to Approved</p></figcaption></figure>
{% endstep %}
{% endstepper %}

***

#### How to edit or remove a connector

Click a connector to select it. Its two ends show as small circles, the **Retarget source** and **Retarget target** handles. Drag either handle onto a different card or edge to re-route that end. To remove a connector, select it and press **Delete** or **Backspace**.

***

#### How to set up swimlanes and lines of interaction

A flow lane's rows are its swimlanes, and you can also add horizontal lines of interaction across the lane, the reference lines a service blueprint uses (a line of visibility, a line of interaction, and so on). Both live in the **Edit rows** dialog.

{% stepper %}
{% step %}
**Open Edit rows**

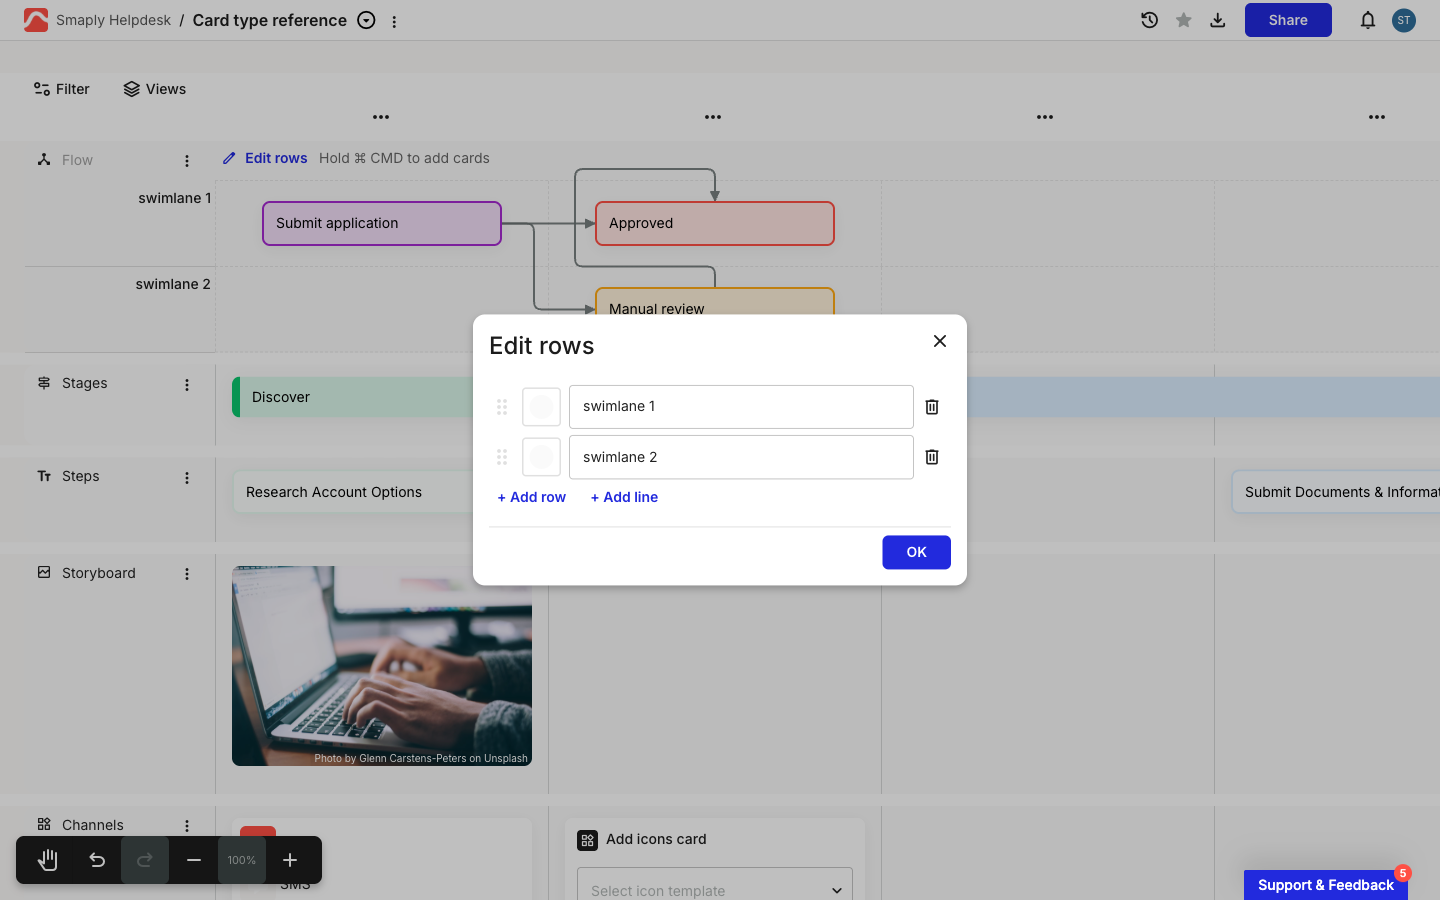
Click **Edit rows** at the top-left of the flow lane. The dialog lists the lane's current swimlanes.
{% endstep %}

{% step %}
**Add swimlanes and lines**

Click **+ Add row** to add a swimlane, and type a name in each row's field. Click **+ Add line** to add a line of interaction: it comes named **Line of visibility** by default, so rename it to whatever the blueprint needs, set its colour with the swatch, and switch between a solid and dashed style with the toggle. Reorder rows and lines with their drag handles, remove any with the trash icon, and click **OK** to apply.

<figure><img src="/files/wrJdUUJhWs75u4qemEdK" alt="The Edit rows dialog for a flow lane, listing swimlane 1 and swimlane 2, each with a drag handle, colour swatch, name field, and delete icon, plus + Add row and + Add line links and an OK button."><figcaption><p>Edit rows: + Add row for swimlanes, + Add line for a line of interaction</p></figcaption></figure>
{% endstep %}
{% endstepper %}

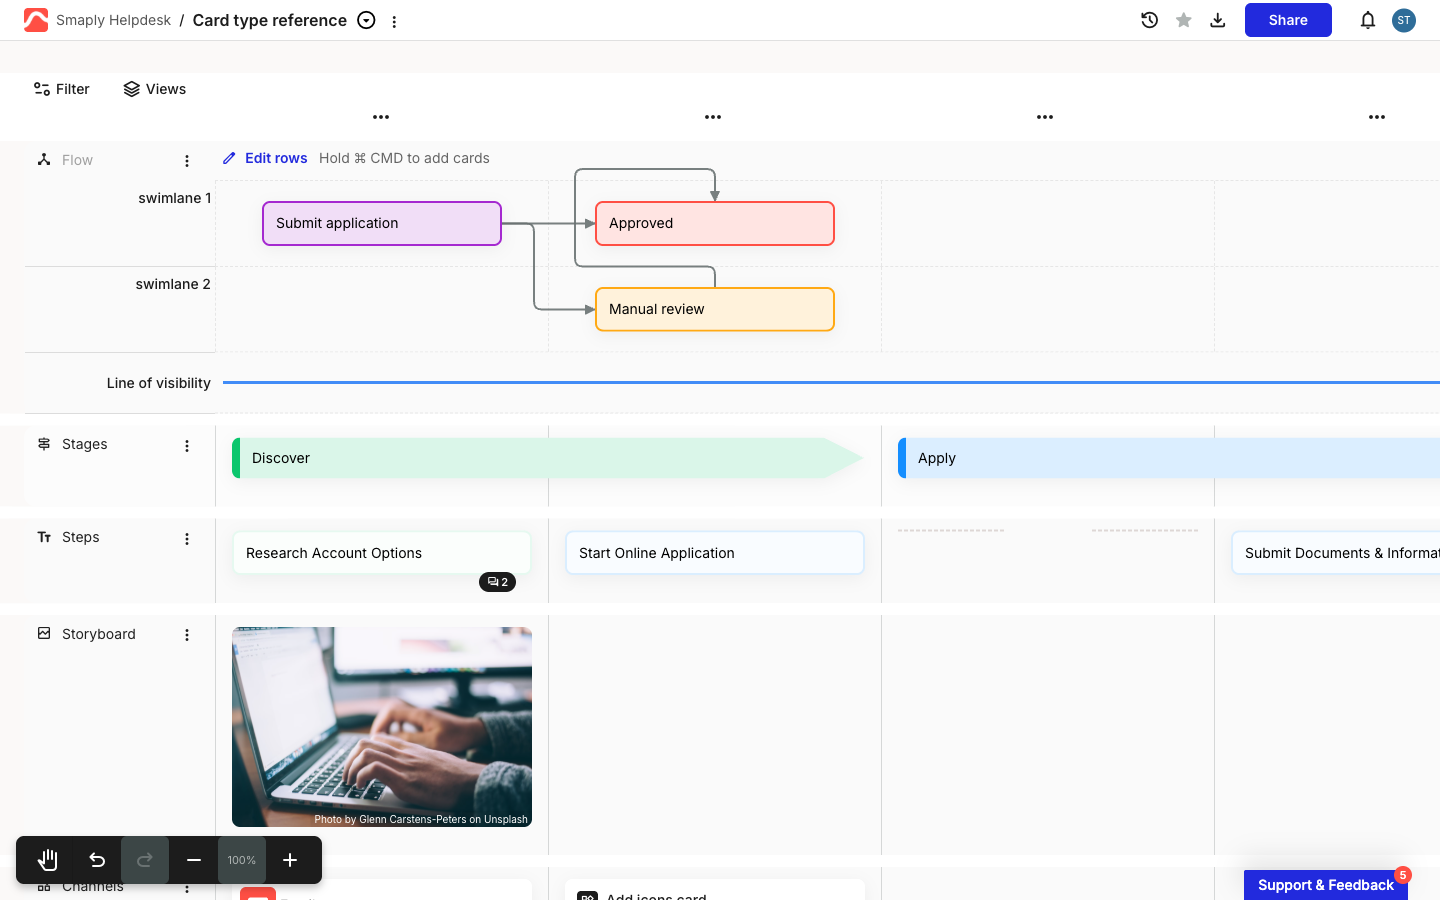
A line of interaction then runs full-width across the lane, labelled with its name down the left. Connectors can cross it, so you can show a step moving from one side of the line to the other.

<figure><img src="/files/QOYoXL2Mygu1YJ9MwnCF" alt="A flow lane with a full-width horizontal Line of visibility drawn across it below the swimlanes, added as a line of interaction."><figcaption><p>A Line of visibility rendered across the flow lane</p></figcaption></figure>

***

#### Related topics

<table data-column-title-hidden data-view="cards"><thead><tr><th>Title</th><th>Description</th><th data-hidden data-card-target data-type="content-ref">Target</th></tr></thead><tbody><tr><td><strong>How to use grid lanes</strong></td><td>The row-and-column lane a flow lane is built on, without the connectors.</td><td><a href="/pages/lZD6w7ZNrPaXH8F0kQNn">/pages/lZD6w7ZNrPaXH8F0kQNn</a></td></tr><tr><td><strong>How to add and manage lanes</strong></td><td>Add a flow lane, reorder it, recolour it, or delete it, alongside every other lane type.</td><td><a href="/pages/cEW7pumNPGKdJ65EEAz7">/pages/cEW7pumNPGKdJ65EEAz7</a></td></tr><tr><td><strong>How to add and edit cards</strong></td><td>Add cards to a flow lane's cells and manage their tags, personas, and comments.</td><td><a href="/pages/DI00pTOdaJmOwltHKgIa">/pages/DI00pTOdaJmOwltHKgIa</a></td></tr><tr><td><strong>How to use divider lanes</strong></td><td>Separate whole sections of a map with a labelled horizontal divider.</td><td><a href="/pages/zzJGjcbYJh57GoelmXzE">/pages/zzJGjcbYJh57GoelmXzE</a></td></tr></tbody></table>


---

# Agent Instructions
This documentation is published with GitBook. GitBook is the documentation platform designed so that both humans and AI agents can read, navigate, and reason over technical content effectively. Learn more at gitbook.com.

## Querying This Documentation
If you need additional information that is not directly available in this page, you can query the documentation dynamically by asking a question.

Perform an HTTP GET request on the current page URL with the `ask` query parameter, and the optional `goal` query parameter:

```
GET https://helpdesk.smaply.app/journey-maps/lanes/how-to-use-flow-lanes.md?ask=<question>&goal=<endgoal>
```

`ask` is the immediate question: it should be specific, self-contained, and written in natural language.
`goal` is optional and describes the broader end goal you are ultimately trying to accomplish on behalf of the user. GitBook uses it to tailor the answer towards what is most useful for that goal.

The response will contain a direct answer to the question and relevant excerpts and sources from the documentation.

Use this mechanism when the answer is not explicitly present in the current page, you need clarification or additional context, or you want to retrieve related documentation sections.